This documentation is a detailed guide for setting up single sign-on (SSO) through Google, leveraging SAML 2.0 or OIDC.
The SAML application is configured in Google Workspace, while the OIDC application is configured in Google Cloud. The Google Cloud OIDC flow does not natively support the `groups` claim. For details on supported claims, see The Discovery document from Google.
You do not need to configure both OIDC and SAML applications for your integration. Depending on your organization's infrastructure and preferences, you can choose either OIDC or SAML.
If an IdP-initiated flow is required, SAML federation is recommended.
The following procedures require copying and pasting information between Google and theDelinea Platform. We recommend opening both applications before you begin, and keeping both open until you are finished.
Prerequisites
-
On theDelinea Platform, you need to be an Admin with federation privileges.
-
In Google Workspace (SAML app) and Google Cloud (OIDC app), you need an account with super administrator privileges.
Build a custom Google Workspace SAML app.
-
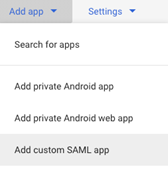
In the Google Admin console, go to Apps > Web and mobile apps.
-
Click Add App > Add custom SAML app.
-
On the App details screen, populate the App name and other (optional) fields:
-
App name (required)
-
Description (optional)
-
App icon (optional)
-
-
Click Continue.
-
On the Google Identity Provider details page, click DOWNLOAD METADATA to download the file, GoogleIDPMetadata.xml. The file contains the IdP metadata required by the Delinea Platform.
-
Click Continue.
Add the Provider to the Platform
-
Navigate to the Federation Providers page.
-
Click Add Provider.
-
Select SAML from the drop-down menu. The Add Provider page opens.
Settings
In the Settings section, the fields are automatically populated when you upload the SAML provider configuration file and click Apply, as described below:
-
SAML provider configuration: Click Select file.
-
Navigate to and select the federation metadata XML file (e.g. GoogleIDPMetadata.xml) that you previously downloaded. The word, Apply will appear above the right end of the SAML provider configuration field.
-
Click Apply. The words Uploaded successfully will appear next to SAML provider configuration, and the fields below will be auto-populated:
-
Name: Auto-generated from metadata
-
Protocol: SAML (auto-filled)
-
Status: Disabled
-
Entity ID: [example: https://accounts.google.com/o/saml2?idpid=C02hflra4]
-
IDP Certificate:
-
Signature
-
Algorithm
-
Thumbprint
-
Not valid before
-
Not valid after
-
Issuer
-
-
IDP Login URL: (example: https://accounts.google.com/o/saml2/idp?idpid=C02hflra4)
-
IDP Logout URL: empty
-
Platform Callback URL:
https://{HOSTNAME}/identity-federation/saml/assertion-consumer -
Platform Logout URL:
https://{HOSTNAME}/identity-federation/saml/logout-consumer -
Status: disabled by default
-
4. (Optional) To rename federation, click Edit, update the Name, and click Save.
Advanced Settings
Under Advanced Settings, enable the option, Customize certificate issuer sent to IdP and copy the value. For details on other options, see Advanced Settings (SAML only) under Federation Management.
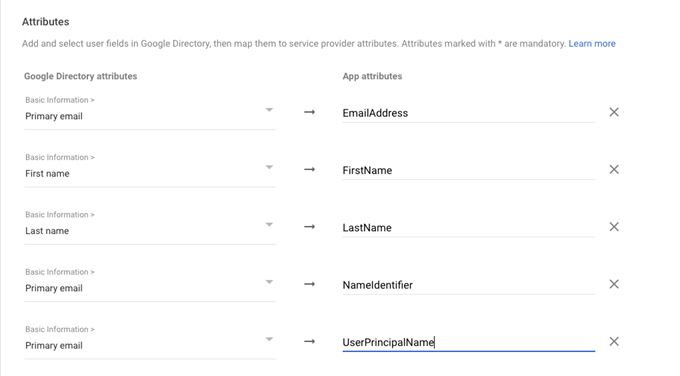
Attribute Mappings
Under Attribute Mappings, configure user attributes as shown below. For details, see Attribute Mappings under Federation Management.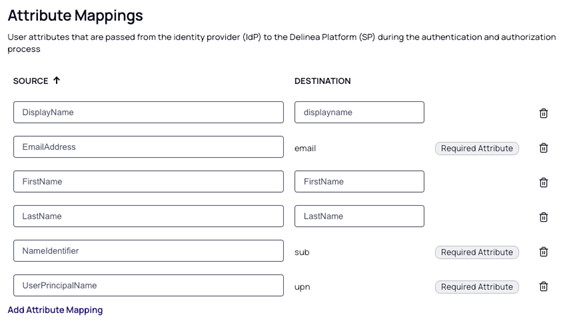
Group Mappings
(Optional) Under Group Mappings, configure the groups that will be included in the SAML response. For details, see Mapping Federated Groups under Federation Management.
Example: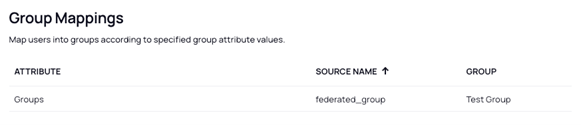
To configure the IdP to send groups in the SAML response, refer to the Update Google Workspace section below.
User Mappings
See Mapping Federated Users under Federation Management.
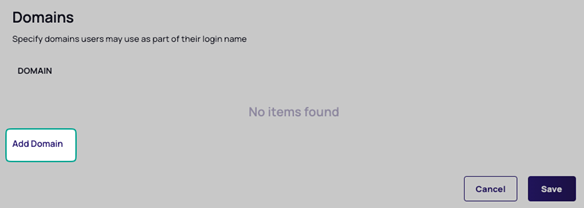
Domains
-
Navigate to the Domains section.
-
Click Add Domain.
-
Enter the domain from the email addresses of the users you are including in this federation.
Update Google Workspace
Update the custom SAML app with the values from the Delinea Platform.
-
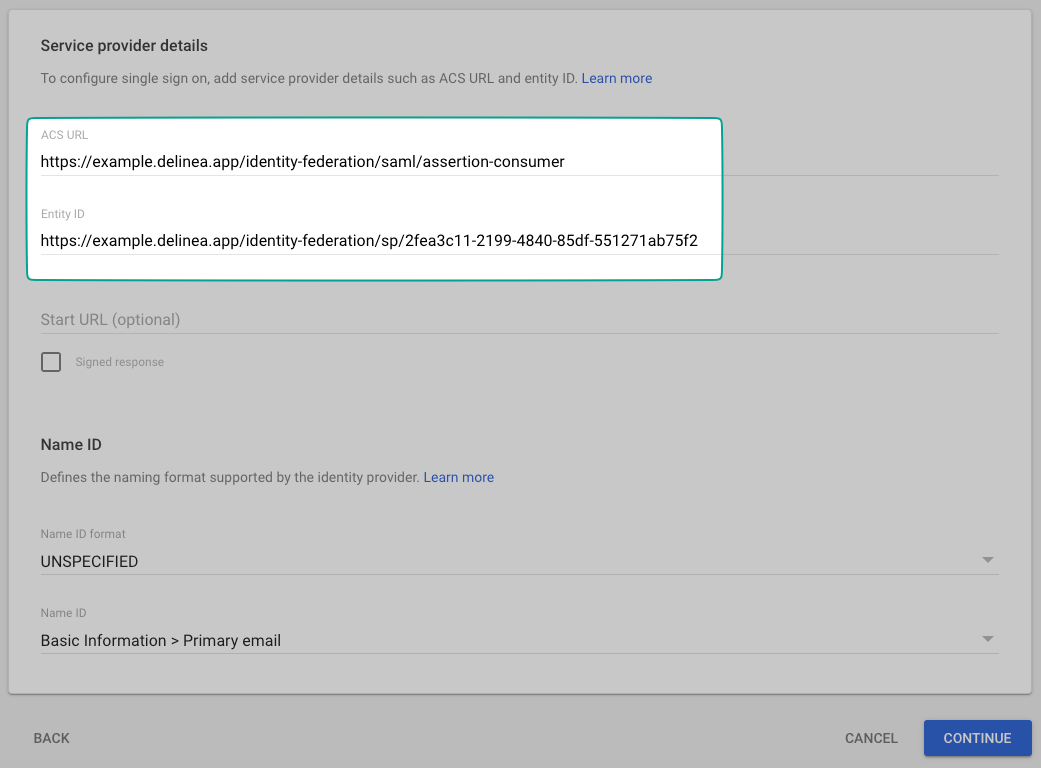
In the Service Provider Details window, enter the following:
-
ACS URL: (the service provider's Assertion Consumer Service URL receives the SAML response). Enter the Platform Callback URL value from the platform.
-
Entity ID: (the globally unique name). Enter the Customize certificate issuer sent to IDP value from the platform.
-
-
Click Continue.
-
On the Service provider details page, update the Attributes.
-
(Optional) Enter group names that are relevant for this app. The Google groups name and the App attribute will be used to configure the Delinea Platform Group Mappings (to learn more about creating groups, see Create a group in your organization on Google Workspace Help Center):
-
In the Group membership (optional) section, click Search for a group.
-
Select a group.
-
Add the App attribute, Groups.
Example: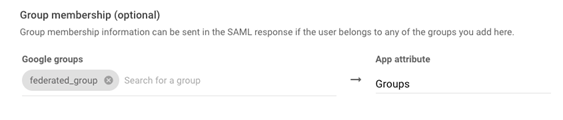
-
-
Click Finish.
Turn on Your SAML App
-
Select your SAML app.
-
Click User access.
-
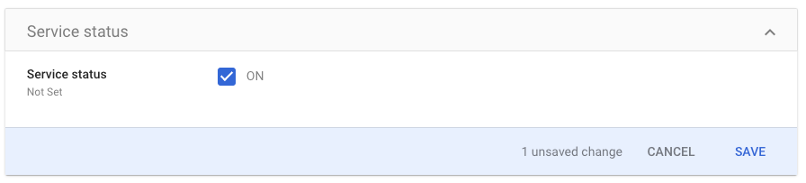
Under Service Status, do one of the following:
-
To turn the service on or off for everyone:
-
Select On for everyone or Off for everyone
-
Click SAVE.
-
-
To turn the service on for a set of users across or within organizational units:
-
Update the Groups or Organizational Units.
-
For Service status, select the box next to ON .
-
Click SAVE.
-
-
-
Ensure that the user email addresses for signing in to the SAML app match the user email addresses for signing in to your Google domain.
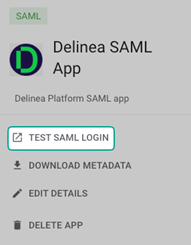
Test Your SAML App
-
Select your SAML app.
-
Click TEST SAML Login
-
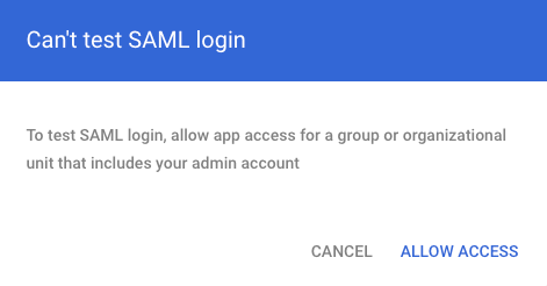
Log in.
-
If you are prompted to allow app access for a group or organizational unit that includes your admin account, click ALLOW ACCESS.
Build a Custom Google OIDC App
-
In the Google Cloud console, navigate to Credentials > CREATE PROJECT.
-
Update the Project name, Organization, and Location fields as needed and click Create.
-
Select target users on the OAuth consent screen:
-
Select User Type (Internal or External).
-
Click CREATE.
-
-
Continue to configure details on the OAuth consent screen:
-
Update the App name, User support email, and Developer contact information fields as needed.
-
Click SAVE AND CONTINUE.
-
-
Configure Scopes.
-
Click ADD OR REMOVE SCOPES.
-
Select …/auth/userinfo.email scope.
-
Click SAVE AND CONTINUE.

-
-
On the Summary page, edit as needed and click BACK TO DASHBOARD.
-
Create OAUTH 2.0 Credentials:
-
Navigate to Credentials > CREATE CREDENTIALS
-
Select OAUTH client ID.
-
Select Application type > Web application.
-
Update the required fields as needed.
-
Click CREATE.
-
On the OAuth client create modal screen, copy and paste the Client ID and Client secret to a known location. These will be used to configure the Delinea Platform OIDC federation.
-
In the Authorized redirect URIs section, click ADD URI and add the Platform Callback URL (in the next section, Add the Provider to the Platform, see Settings).
-
Click OK.
-
-
Add the Provider to the Platform
-
Navigate to the Federation Providers page.
-
Click Add Provider.
-
Select OIDC from the drop-down menu. The Add Provider page opens.
Settings
-
Update Name.
-
(Optional) Update Status.
-
Add Endpoint URL:
https://accounts.google.com/ -
Update the Client ID with the Client ID value provided by Google.
-
Update the Client secret with the Client Secret value provided by Google.
-
(Optional) Update Prompt.
-
Copy and save the Platform callback URL value.
Attribute Mappings
Under Attribute Mappings, configure the user attributes as shown below. For details, see Attribute Mappings under Federation Management.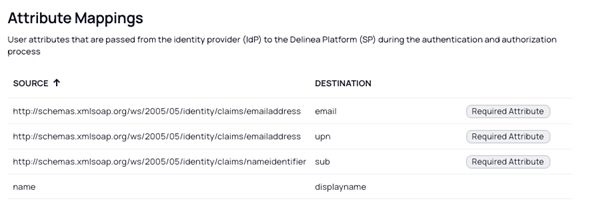
Group Mappings
See Mapping Federated Groups under Federation Management.
The Google Cloud OIDC flow does not natively support the `groups` claim. For details on supported claims, see The Discovery document from Google. If group mapping is required, SAML federation is recommended.
User Mappings
See Mapping Federated Users under Federation Management.