MFA for Secrets
Multi-factor Authentication (MFA) for Secrets, available exclusively through the Delinea Platform, gives platform administrators the option to add one or more security requirements for accessing specified secrets. MFA for Secrets can be used in a wide range of scenarios including email, the Delinea Credential Manager (mobile) App, and hardware authentication devices such as YubiKey.
Availability
MFA for Secrets is available to all customers automatically. No initial global configuration is required to enable the feature. Secrets have the feature disabled by default, but you can easily enable it on an individual secret or on multiple secrets simultaneously. For example, if you apply a secret policy to a folder that enables MFA on secrets, all secrets added to that folder inherit the policy setting enabling MFA.
Default MFA Profile
When MFA is enabled on a secret, the Step-up Authentication Default profile applies to the secret. This profile uses email for the default authentication mechanism, and because the email is already in the user database, the user does not need to configure anything. Although the email mechanism is easiest for the user, there may be situations that call for a login mechanism stronger than email.
For information on viewing, managing and assigning authentication profiles, and on selecting challenges for the profiles, see Creating Authentication Profiles.
If you wish to modify a secret that requires MFA, you will be prompted with an MFA challenge before you can make any changes.
Assigning MFA to Secrets
You can assign MFA to secrets several ways:
- Assign MFA to an individual secret
- Assign MFA to a secret policy
- Assign MFA to a secret through a bulk operation
Assigning MFA to an Individual Secret
-
Click Secret Server from the left navigation.
-
On the All Secrets page, click the name of a secret in the table. The page for that secret appears.
The enabled secret in this case inherits a default authentication profile selected on a global level.
-
Select the Security tab.
-
In the Multi-factor Authentication section, click Edit.
-
Select the box next to Require Multi-factor Authentication.
-
Click Save.
Assigning MFA to a Secret Policy
- Navigate to the Secret policy. page.
- Click a policy.
- Select the Security tab.
- Click Edit.
- Next to Require Multi-factor Authentication, select Yes from the dropdown list.
- Click Save.
Assigning MFA to Secrets Through a Bulk Operation
- Click Secret Server from the left navigation.
- On the All Secrets page, select the checkboxes for two or more secrets.
- In the small banner that appears, click Bulk Actions.
- In the Bulk Actions dialog, under Security, click Change Security Options.
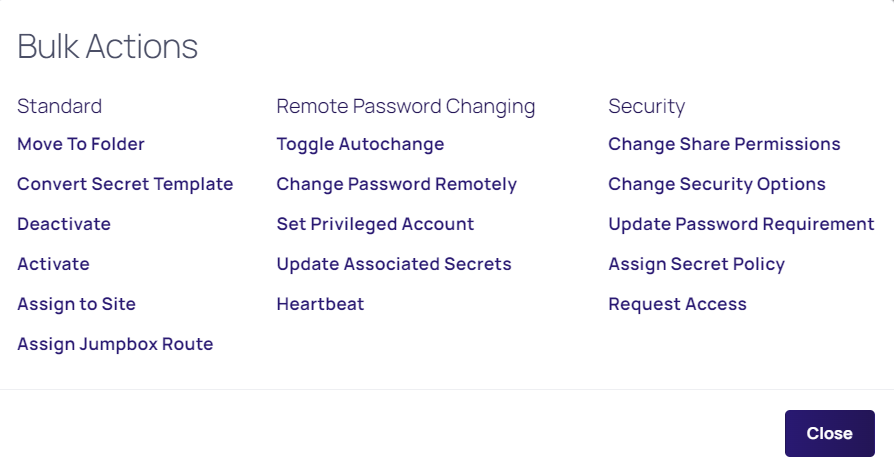
- Next to Multi-factor Authentication, select Enable Multi-factor Authentication from the dropdown list.
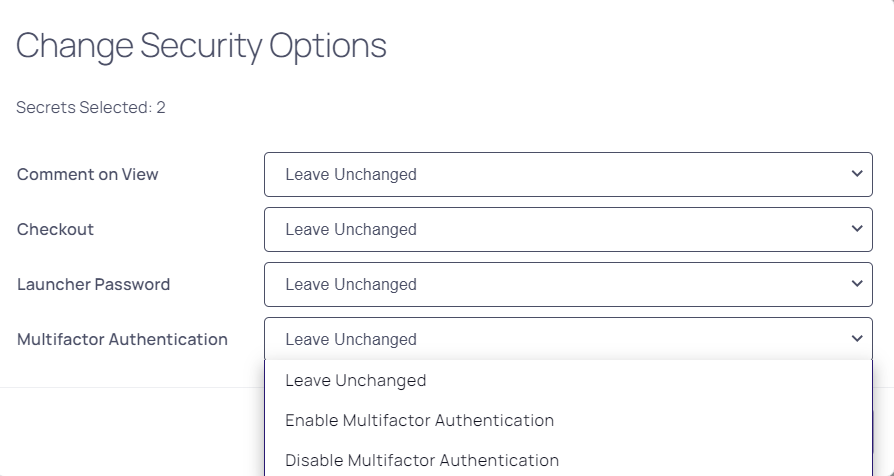
- Click Save.
Applying an MFA Profile to All Enabled Secrets
-
Click Settings from the left navigation, then click Administration under Secret Server.
-
On the Secrets Administration page, click Security MFA authentication under Security.
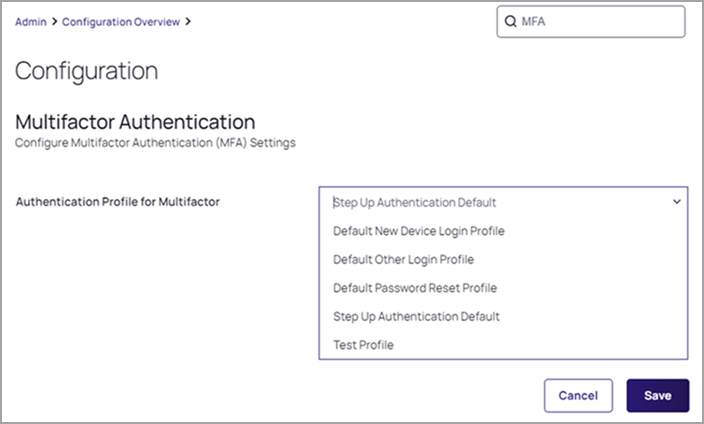
-
Click Edit.
-
Select an MFA profile from the dropdown list.
-
Click Save.
Considerations for Assigning MFA to Secrets
Note the following when configuring or assigning MFA to secrets:
- Secrets with MFA enabled are accessible in a disaster recovery replica by an administrator with unlimited permissions. The MFA requirement remains intact.
- When exporting secrets, if any secret in the selected list has MFA enabled, you are prompted for MFA.
- The profile you selected for secret MFA does not affect the profile for authenticating to the Delinea Platform.
- Secret Server Cloud cannot access MFA-protected secrets unless it was itself authenticated through the platform. If this authentication was not done, the user is prompted with a link to redirect to the secret in the platform.
- MFA-enabled secrets are not available in the Secret Server mobile application.