Using SSH Session Groups
Users can now create one or more groups of active SSH sessions, then send a command or a series of commands in bulk to all active sessions in the group.
Creating and Naming an SSH Group
You can create a new SSH Group two ways. The first is this way:
- Select the sessions you want to include in the group
- Click the Create a Group toolbar icon.
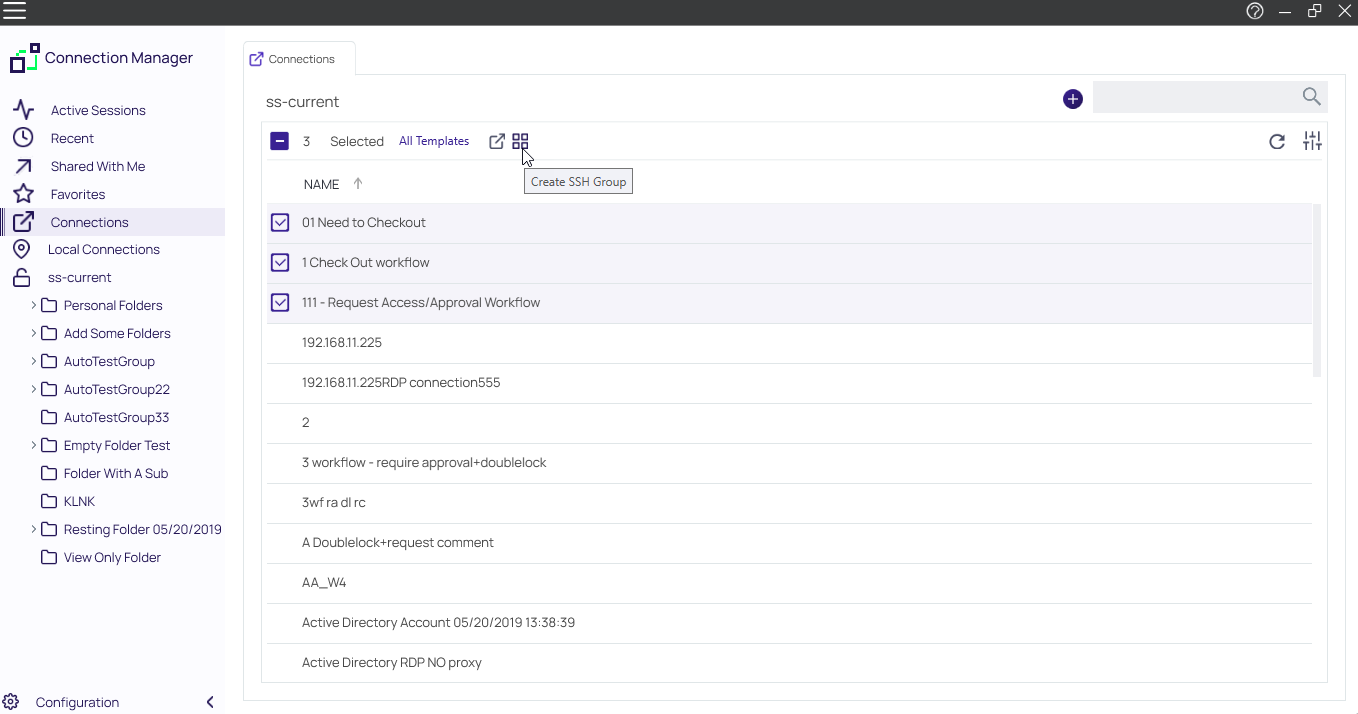
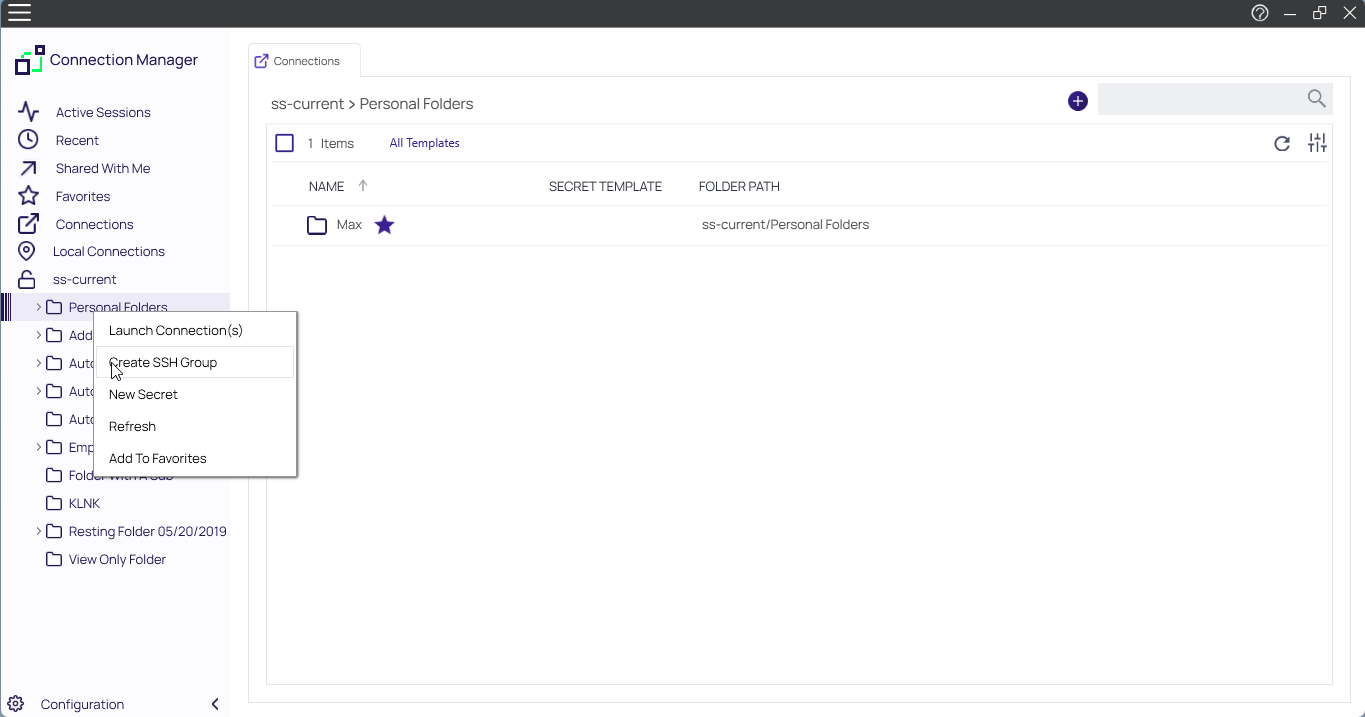
The second is to use the Create SSH Group option in right-click context menus.
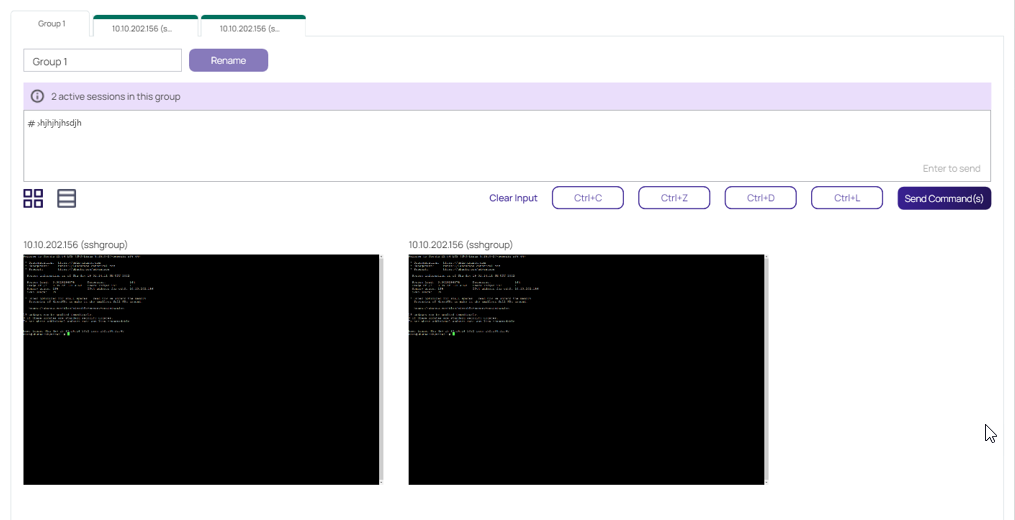
When the SSH Group is created, it opens in its own window with a special Group tab followed by the individual tabs for each SSH session in the group.
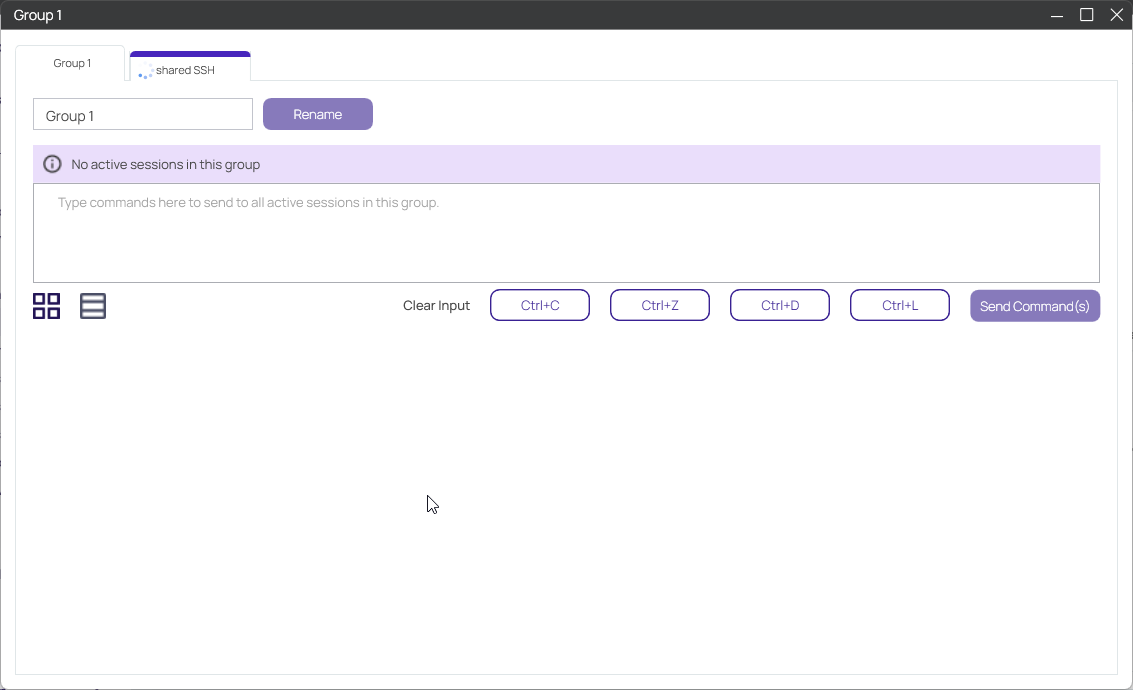
If the user has generated the SSH Group from sessions occupying a single folder, the group tab will be labeled with the name of the original folder. If the user has generated the SSH Group from sessions that did not occupy a single folder, the group tab will be labeled with a generated sequential name such as Group 1, Group 2, etc. The user can always change any group name from the name it was assigned initially.
Sending Commands to the SSH Group
At the top of the Group tab is a command window, where users can input one or more commands to send to all sessions in the group. To send a single command, the user simply enters the command and presses the Enter key or clicks the Send Command(s) button. To send a series of commands as a group, the user enters each command followed by Ctrl+Enter. When the user has entered the last command in the series, pressing the Enter key or clicking the Send Command(s) button sends all of the commands to all SSH sessions in the group, following the sequence in which they were entered.
The four commands listed below are built into the user interface as individual buttons:
- Ctrl+C Kill whatever you are running. The confirmation alert should be displayed, the command should be broadcast to all sessions, and the top command should be stopped.
- Ctrl+D Exit the current shell. The "exit" should be displayed on all SSH sessions in the group; all sessions in the group should be closed, and the Group window should be closed.
- Ctrl+L Clear the screen, similar to the Clear command.
- Ctrl+Z Send whatever you are running into a suspended background process. fg restores it. The top command should be sent into the background.
Options for Displaying SSH Sessions on the Group Tab
The main SSH Group tab displays the SSH sessions in a grid by default. In this grid view the session panels do not change size, but as the user makes the Group window larger or smaller, the panels rearrange themselves in the window for optimal fit and display.
The user can change the display of SSH sessions from a grid to a stack (single column) layout, which leaves more horizontal space across the window, allowing each session to be enlarged for better visibility. The two views can be toggled back and forth using the grid and stack icons shown below.

Building an SSH Group
An SSH session cannot belong to more than one group at a time, so you cannot add an SSH session that already belongs to an SSH Group into a second SSH Group. But if an SSH session does not belong to any group, you can add it to an existing SSH Group by detaching the session tab from a window and dragging and dropping the tab into the Group window. Once a session has been added to a Group, you cannot remove the session from the group by detaching its tab and dragging it elsewhere.
Closing an SSH Group
You cannot close an SSH Group by closing the Group tab or by removing the active sessions. The only way to close an SSH Group is to close the Group window.