How to Customize the Admin and Login Window
You can customize the look and feel of your Admin Portal.
You can restore the defaults for most options by clicking Reset.
Customizations may not display with the initial user log in. Users may need to re-log in to see the changes reflected.
To Customize the Look and Feel
-
Log in to Admin Portal.
-
Click Settings > General > Account Customization.
-
Edit the fields under Global Options.
-
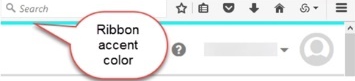
Enter the hexadecimal color code for Portal Ribbon Accent Color to change the ribbon color. Do not enter the RGB value.
-
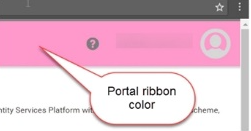
Enter the hexadecimal color code for Portal Ribbon Color to change the ribbon color. Do not enter the RGB value.
-
Enter your Company Name.
-
Browse to and select the image file for the Portal Image and click Open.
-
-
Edit the fields under Login Customization.
-
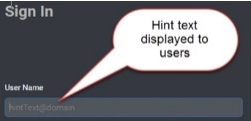
Define the User Name hint text displayed to users on the login page window. You can click Reset to reset this field to its default value of user@domain.
-
Click Upload to browse to and select the image file for the Login Image, then click Open.
-
Click Upload to browse to and select the image file for the Login Background Image, then click Open.
The background image must have a file size between 512 Bytes and 5 MB, with dimensions of at least 700 x 490. Support file types are .png, .jpg, .ico, .bmp, and .gif (non-animated).
-
Enter the URL to your company Terms of Use.
Terms of Use will appear below the login image.
-
Enter the URL to your company Privacy Policy.
Privacy Policy will appear below the login image.
-
-
Edit the fields under Message Customization.
-
Click Upload to browse to and select the image file for Email Image.
This is typically your company logo, and is only used for customized messages.
-
Edit any of the default response templates provided.
-
Click the row associated with the template.
-
Edit the Language, Email Subject, Display Name, and Email Address fields as needed.
-
Click the Script tab to modify the content of the message as needed. The message body can be found in the HTML on the script tab.
-
In the Forgot User Name message template, you can change the message to drop the login suffix when the email is sent to a user by replacing the variable
{UserList}with{UserLoginNameList}.Make the change on the Script tab, then return to the Preview tab to verify the variable has changed. The result is the user receives an email with a list of usernames matching their email address that do not include the login suffix. This can prevent confusion for users when you use multiple login suffixes.
-
-
Optionally, to undo customizations:
Click the Reset button associated with User Name Hint Text at Login to use the default hint text.
Click the Reset button at the bottom of the page to use the default settings for all the customization options on this page.
Click the Reset button on the message template to use default settings for that message template.
-
-
Click Save to exit.