Using FIDO2 Authenticators
FIDO2 is an authentication standard hosted by FIDO Alliance. This standard includes the Web Authentication ("WebAuthn") API, which is a specification written by the World Wide Web Consortium (W3C) and FIDO, with participation from additional third parties. The WebAuthn API is backward-compatible with Universal 2nd Factor (U2F) keys.
Delinea leverages the WebAuthn API to enable passwordless authentication to the Privileged Access Service using either on-device or external authenticators. On-device authenticators are biometric authenticators integrated into the device hardware. Popular examples are Mac Touch ID, Windows Hello, and fingerprint scanners. External authenticators are security keys that you plug into the device's USB port; for example, a YubiKey.
This feature requires prior configurations by your systems administrator.
To configure your FIDO2 Authenticator:
-
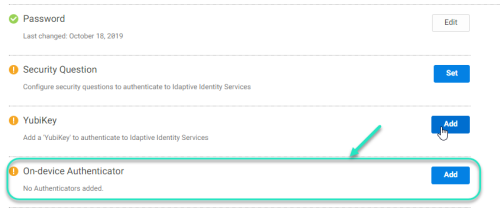
Log in to the Admin Portal > Profile page.
-
Click Security and then the button associated with the FIDO2 Authenticator name created by your systems administrator.
-
Add a FIDO2 Security Key (for example, a YubiKey), or an On-device Authenticator.
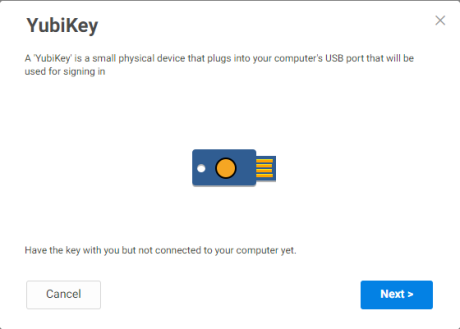
Security Key
-
Click Next on the information screen.
-
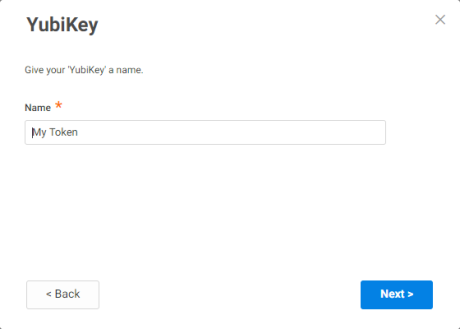
Enter a name for your security token.
Most users will have only one token, but this name differentiates multiple tokens.
-
Click Next.
-
Insert your FIDO2 security key into your computer and follow the instructions on the screen.
You can now use your FIDO2 security key to authenticate to Privileged Access Service.
On-device Authenticator
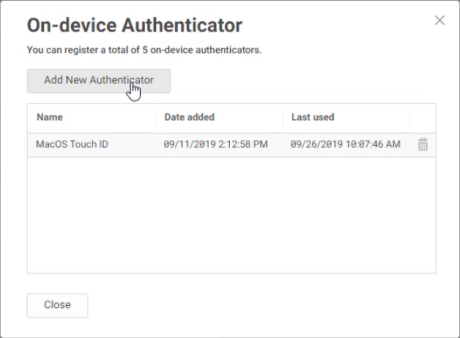
Click the Add button associated with the On-device Authenticator that you want to configure, then follow the on-screen instructions.
For example, the following procedures illustrate how to register a Windows Hello or Mac Touch ID authenticator. Other on-device authenticators have similar procedures.
Windows Hello
-
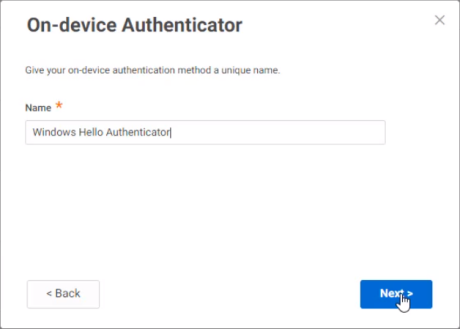
Click Add New Authenticator, then click Next on the following screen explaining what an on-device authenticator is.
-
Enter a name for the authenticator, then click Next.
-
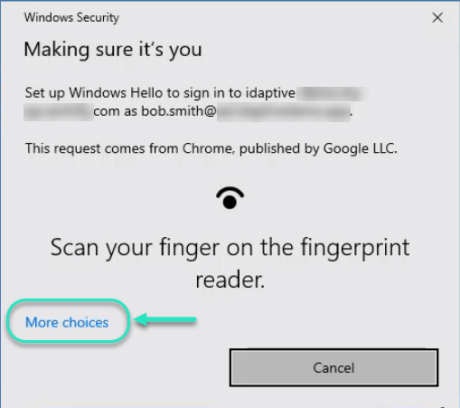
Interact with the authenticator at the prompt.
For Windows Hello, this could be a PIN, fingerprint, or security key. Click More choices if you want to change how you interact with Windows Hello.
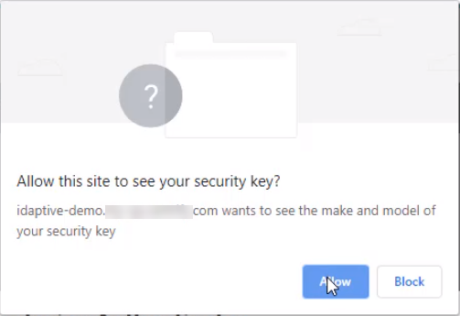
After interacting with the authenticator, a prompt appears asking for permission for the site to see your security key.
-
Click Allow to allow Delinea to see your security key (in this case, your fingerprint).
-
Enter any additional authentication that your administrator has required to complete the action, then click Next.
-
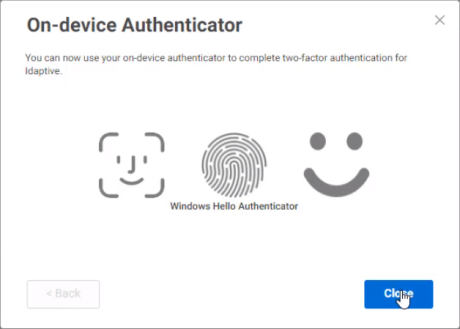
Click close on the final screen indicating that you can now use your on-device authenticator.
Mac Touch ID
-
Click Add New Authenticator, then click Next on the following screen explaining what an on-device authenticator is.
The lid on the Mac must be open for the browser to find the on-device authenticator.
-
Enter a name for the authenticator, then click Next.

-
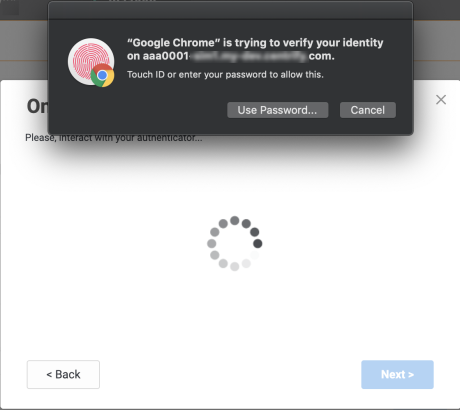
Scan your finger on the fingerprint reader at the prompt.
After scanning your finger, a prompt appears asking for permission for the site to verify your identity.
-
Click Use Password... to enter your password and allow the browser to verify your identity.
-
Enter any additional authentication that your administrator has required to complete the action, then click Next.
-
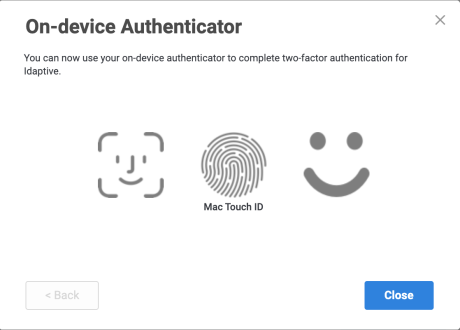
Click close on the final screen indicating that you can now use your on-device authenticator.
-
You may receive the following warning message: “Your current browser does not support <admin defined name> registration. Please contact your system administrator.” The Web Authentication APIs used by FIDO2 authenticators are only supported on specified browsers. This browser support is controlled by the W3C and the FIDO Alliance and is unrelated to Privileged Access Service. Refer to https://fidoalliance.org/fido2/fido2-web-authentication-webauthn/ for more information.