Creating and Managing Resource Profiles
Adding Resource Profiles
You must have Privileged Access Service Administrator or System Administrator rights to create a custom resource.
-
In the Admin Portal, navigate to Settings > Resources > ResourceProfiles and choose Add Profile. For the first part of the add profile, enter fields as seen below:
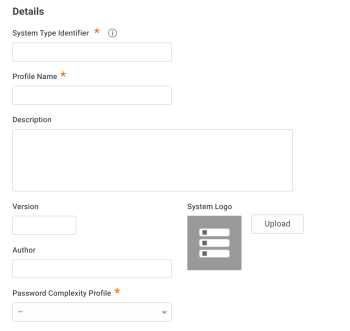
The required fields are as follows:
-
System Type Identifier*: The system type shown in the Add System wizard.
-
Profile Name*: a display name for the system.
-
Description: system description.
-
Version: assign version to system.
-
SystemLogo: upload a logo for your system.
-
Author: system author.
-
Password Complexity Profile*: allows you to choose an existing profile or create your own. To create your own profile, choose Add New Profile, see "Configuring password profiles."
-
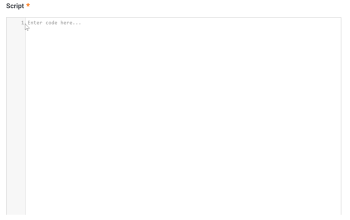
Script*: Enter a resource profile script. You may copy and paste your script into this field:
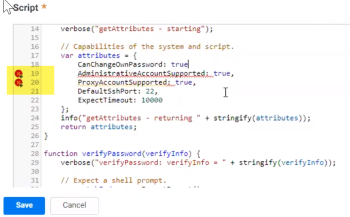
If there are any syntax errors in the script, you will see a red flag as shown below:
-
Updating Resource Profile Settings
To update resource profile settings, navigate to Settings > Resources > ResourceProfiles and choose an existing profile where you can edit the profile fields.
"Adding or updating resource profile permissions"
Add a user, group, or role to grant permissions to this resource profile.
"Resource profile activity"
View resource profile activity by date and detail.