Setting System‑specific Policies
You can set policies for individual systems or set global policies to apply to all systems you add to the Privileged Access Service except where you have explicitly defined a system-specific policy. If you use a combination of global and system-specific policies, the system-specific policies take precedence over the global policies you set.
If you have the appropriate permissions to set global system policies, see "Setting global security options" for more information. If you are not using global policies, only want to set policies on individual systems, or want to override global policies on specific systems, you can set the following policies on a case-by-case basis:
- "Allow remote access from a public network"
- "Allow RDP client to sync local clipboard with remote session"
- "Checkout lifetime"
- "System login challenge rules and default profile"
- "Authentication if managing the service on-site"
- "Privilege Elevation challenge rules and default profile"
- "Enabling client automatic updates"
To set system-specific policies:
- In the Admin Portal, click Resources, then click Systems to display the list of computers and network devices.
- Select a system to display system-specific details.
- Click Policy.
- Select settings for any or all of the system policies.
- Click Save.
For more information about how to set the system-specific policies, click the policy link or the information icon in the Admin Portal.
Allowing Remote Access from a Public Network
Select Yes if you want to allow remote connections from inside or outside of a defined corporate IP address range. If you select Yes, administrators can log on remotely to the selected system from computers or devices that are inside or outside of the corporate IP address range. If you select No, administrators will be denied access if they attempt to log on to the selected system from a connection outside of the corporate IP address range.
If you do not specify a corporate IP address range to define your internal network, all IP addresses are treated as external connections from outside of the firewall and remote access is denied by default.
Allowing RDP Clients to Sync Local Clipboards with Remote Sessions
Select Yes for the ability to copy and paste text or images while in a web based RDP session. When enabled, allows you to copy texts or images from a local machine and paste them to the remote session and vice versa. Applies to RDP native client and web clients as follows:
| Browser | Text support | Image support |
|---|---|---|
| Chrome | Supported | Supported |
| Edge | Supported | Supported |
| Internet Explorer 11 | Supported | Not supported |
| Safari | Not supported | Not supported |
| Firefox | Not supported | Not supported |
Checkout Lifetime
Type the maximum number of minutes administrators are allowed to have a password checked out. After the number of minutes specified, the Privileged Access Service automatically checks the password back in. The minimum checkout lifetime is 15 minutes. If the policy is not defined, the default checkout lifetime is 60 minutes.
You can extend the checkout time for a password as long as you do so before the initial checkout period expires. For example, if the maximum checkout lifetime is 60 minutes and you extend the checkout time before the 60 minute period is over, the password expiration is reset to the 60 minute checkout lifetime. For more information about configuring the Checkout lifetime policy, see "Extending the password checkout time."
System Login Challenge Rules and Default Profiles
You can configure authentication rules and authentication profiles to protect remote login access for specific systems. Based on the rules you define, users attempting to log on to a system without knowing the stored account password or using specified credentials might be required to answer a security question, answer a phone call, or click a link in an email message to authentication their identity. The authentication rule defines the conditions for when a specific authentication profile should be used. The authentication profile defines the types of challenges presented and whether one-factor or two-factor authentication is required. You can also define a default authentication profile to use if the conditions you specify for the account login rules are not met.
If you don’t create any authentication rules or authentication profiles for logging on without knowing the password for an account, users with the appropriate permission can log on using stored account passwords without being challenged to re-authenticate their identity. If you add authentication rules, a default authentication profile, or both, the policies are evaluated for all attempts to log on to the target system, whether using a stored account password or a specified user name and password.
Supported Authentication Challenges
You should note that only the authentication challenges that are available in a user profile can be presented. For example, you might select Phone call and Email confirmation code in the authentication profile, but these challenges are only valid if users have both a phone number and email address stored for their accounts.
If users only have a phone number and not an email address stored, they will receive a phone call to complete the authentication process rather than be prompted to select an authentication option. If users have both a phone number and an email address stored, they will be prompted to select which form of authentication to use.
Authenticating If Managing Services On-Site
If you have installed Privileged Access Service on your internal network or in a location where you are managing the service yourself, you can define authentication profiles that use most of the same challenges as when the Privileged Access Service is deployed as a cloud-based service. However, some challenges—such as the Email configuration code and Text message confirmation code—require you to configure settings to support outgoing email and SMS-based text messaging.
You can configure the settings for a custom Simple Mail Transport Protocol (SMTP) mail server and a Twilio in the Admin Portal. To support the Mobile Authenticator as a challenge, you must have a properly registered mobile device. For details about post-installation configuration steps when you deploy Privileged Access Service as an on-site service, see the Installation and Configuration Guide for On‑Site Deployment.
To add an authentication rule and profile for remote login access:
-
In the Admin Portal, click Resources, then click Systems to display the list of computers and network devices.
-
Select a system to display system-specific details.
-
Click Policy.
-
Under System Login Challenge Rules, click Add Rule.
-
Click Add Rule to define the conditions to evaluate to determine the authentication profile to use when users attempt to log on to a selected system using the stored account password.
For example, click Add Rule, select a condition such as IP Address and inside of the corporate range, then click Add. You can add more than one condition to the rule. However, all conditions must be true for the rule to apply.
-
Select the authentication profile to use when all of the conditions you specify are true, then click OK.
- You can select any existing authentication profile if an appropriate profile has been previously-defined in the Admin Portal for the Privileged Access Service.
- You can select Not Allowed as the authentication profile if you want to prevent users from logging on using a stored account password when the conditions for this authentication rule are met. For example, you might want to select Not Allowed to prevent login access when the request comes from an IP address outside of the corporate IP range.
- You can select Add New Profile if you want to create a new authentication profile to use when the selected conditions.
If you are adding a new authentication profile, type a profile name, select the types of authentication challenges to present, set the challenge duration time to specify how long a previously‑satisfied authentication challenge is valid, then click OK. For information about creating authentication profiles and specifying the types of authentication challenges for the authentication profiles you define, see "Creating authentication rules" and "Creating authentication profiles."
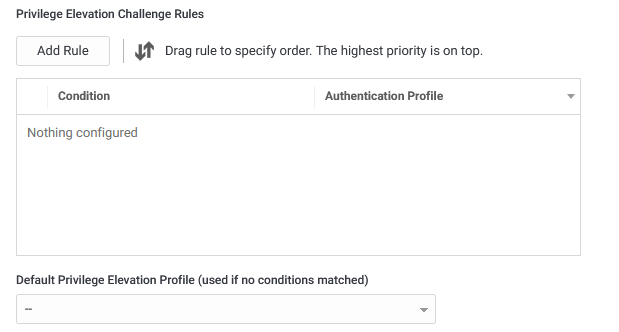
Privilege-Elevation Challenge Rules and Default Profiles
For systems and users that you have configured for privilege elevation, you can set up which conditions will result in which additional authentication credentials that users will have to enter when they try to run a privileged command or application. You also specify a default privilege elevation profile that applies if none of the specified conditions are met.
To configure privilege elevation challenge rules and default authentication profiles
-
Open the policy tab for the desired systems:
- One system: In the Systems area, open the desired system, then click the Policy tab.
- Some or all systems: In the Policies area, open or edit a policy set.
-
In the policy, navigate to Resources > Systems, and then the Privilege Elevation Challenge Rules section of the page.
-
In the Privilege Elevation Challenge Rules area, add rules that specify for a particular condition, apply a particular authentication profile.
-
For the Default Privilege Elevation Profile, specify which authentication profile applies if none of the conditions in the challenge rules are met.
-
Click Save to save your changes.
The challenge rules and default authentication profile changes for privilege elevation take effect when the affected users next log try to run an application with privilege on an affected system.
Enabling Client Automatic Updates
Select Yes to specify that the service automatically updates the Client software on enrolled systems to the latest client version. After you select Yes, you can also specify a time of day to begin the automatic update.