Change the RDP Certificate for Connectors
The NativeRDP functionality requires two files:
- A cert file
RDPServer.crt - A key file
RDPServer.key
The RDP code does not produce, acquire, or generate these files. These files are obtained prior to starting NativeRDP, as a preliminary step performed by the connector and/or manual install.
This page explains how these files are found by the connectorand how to change the default behavior.
How Registry Keys Are Used
The Delinea Connector uses several registry keys to produce the RDP key files required for Native RDP functionality. These key/value pairs are located in HKLM\SOFTWARE\Centrify\Cloud.
| Key | Type | Description |
|---|---|---|
CPS.RDPHostThumbprint
|
String | A thumbprint for the certificate from the Windows Certificate Store. This is used to generate the key files. |
Cps.RDPHostStore
|
String | The name of the Windows Certificate Store container. This is used to search for an installed certificate.This container name is relative to Cert:\LocalMachine\. The default name is Remote Desktop with the full path of CERT:\LocalMachine\Remote Desktop. |
CPS.RDPHostCert
|
String | The encrypted content of the cert file.>Note: This is only for generated certificates. |
CPS.RDPHostKey
|
String | The encrypted content of the key file.>Note: This is only for generated certificates. |
How the Default Functionality Works
Generate Key Files from an Existing Certificate
By default, the Delinea Connector will attempt to generate the key files from an existing certificate . This certificate can be a self-signed certificate or one you've purchased (e.g. from GoDaddy), for use with NativeRDP.
In order to locate the existing certificate, it must be installed in the Windows Certificate Store, under the LocalMachinecontainer.
By default, the connector will look for the file in Cert:\LocalMachine\Remote Desktop. This location can be changed using the CPS.RDPHostStore registry value. The connector looks in this store to find the thumbprint provided by the CPS.RDPHostThumbprint registry value. The thumbprint must be present to override the default behavior.
Generating a New Certificate If One Does Not Exist
If the connector does not find an existing certificate, it will generate one. When this happens, the connector wants to ensure the key files generated survive an upgrade, so they are backed up as secure registry values.
By default, a newly installed connector will generate its own certificate and back up the key files produced from that certificate in the secure registry keys CPS.RDPHostCert and CPS.RDPHostKey.
The certificate generated by the connector uses the default settings as defined by the N-Software third-party software library. See the "documentation for N-Software" for more information about the defaults used to generate the certificate.
The connector only sets the CN to the hostname, not the FQDNor IP.
The auto-generated certificate has about a one year expiration and the certificate won't be auto-renewed.
If the certificate is expired, the user will see a prompt during the Native RDP connection about the certificate expiration.
Extracting Certificate Information
Once a certificate is present, the connector extracts the information into two files, RDPServer.crt and RDPServer.key. If these files were produced from a generated certificate, they also get backed up into secure registry values.
Once the backups exist, they are always used to restore the files on the disk when the connector starts. This means the following will occur:
- If you delete the key files from the disk, they will reappear "automatically".
- If the registry entries are removed, the connector will regenerate its own certificate for use.
To stop the default behavior, see Use your own certificate.
Using Your Own Certificate
To use your own certificate:
-
Get or create a certificate. The certificate must have an exportable private key. To generate a self-signed certificate that can be used with CentrifyNativeRDP:
-
Ensure the following are met:
-
The certificate must be run on the connector machine.
-
The DnsName should be a comma delimited list of all names you want this cert to match against. Generally, it should be:
FQDN(For example,hardhome.bespin.test)Hostname(For example,hardhome)IPAddress(For example,192.168.132.105)
-
FriendlyNameis optional, but recommended. -
Set CertStoreLocation to the store name where this cert will be stored. This is always LocalMachine plus the directory name, for example RemoteDesktop. This value must match the value in the Delinea registry settings.
We recommend you use the default value for simplicity.
-
Set the
NotAftervalue, which supplies an expiration date. The example below uses a 3 year expiration from today.
-
New self-signed certificate:
Copy$SelfSignedCert = New-SelfSignedCertificate -Type SSLServerAuthentication -DnsName $name -CertStoreLocation "cert:\LocalMachine\Remote Desktop" -KeyExportPolicy Exportable -Provider "Microsoft Enhanced RSA and AES Cryptographic Provider" -NotAfter (Get-Date).AddYears(3) -FriendlyName "Hello!" -
-
Install the certificate in the Windows Certificate Store.
Get thumbprint:
CopyPS> $SelfSignedCertificate.Thumbprint
PS> $SelfSignedCertificate.Thumbprint | clipThe installation:
- Displays the thumbprint.
- Copies the thumbprint to the clipboard for the configuration step.
-
Configure the connector to use the certificate:
-
Update the registry on the connector machine.
-
Create a string value for CPS.RDPHostThumbprint, and set it to the thumbprint copied from the previous step.
This is the key step in changing the default behavior.
-
Restart the connector.
-
(Optional) Delete the
CPS.RDPHostCertandCPS.RDPHostKeyregistry values, if they exist.
-
Replace a RDP Default Self-Signed Certificate
To replace a certificate which enforces with the default domain group policy:
-
Open the Group Policy Management application and edit the Default Domain Policy. This applies the Certificate Template to all the servers in the AD Domain.
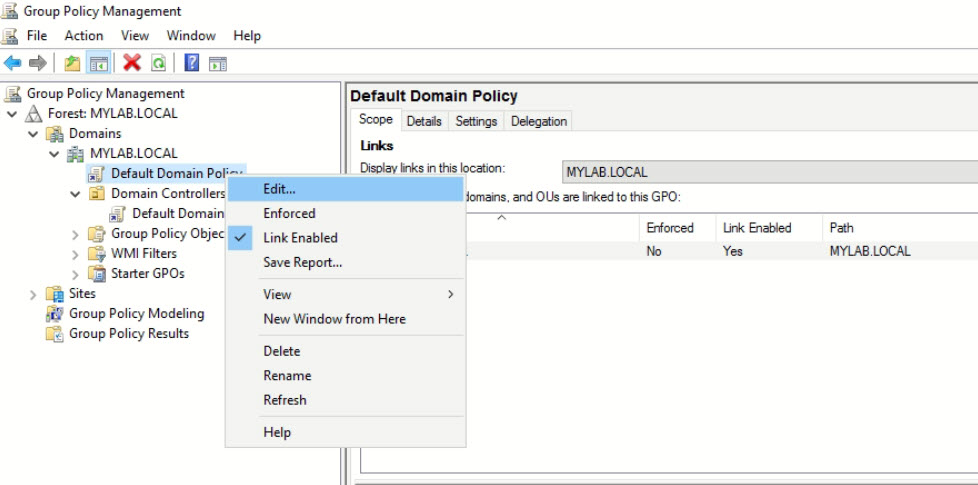
-
Navigate to
Computer Configuration\Policies\Administrative Templates\Windows Components\Remote Desktop Services\Remote Desktop Session Host\Security. -
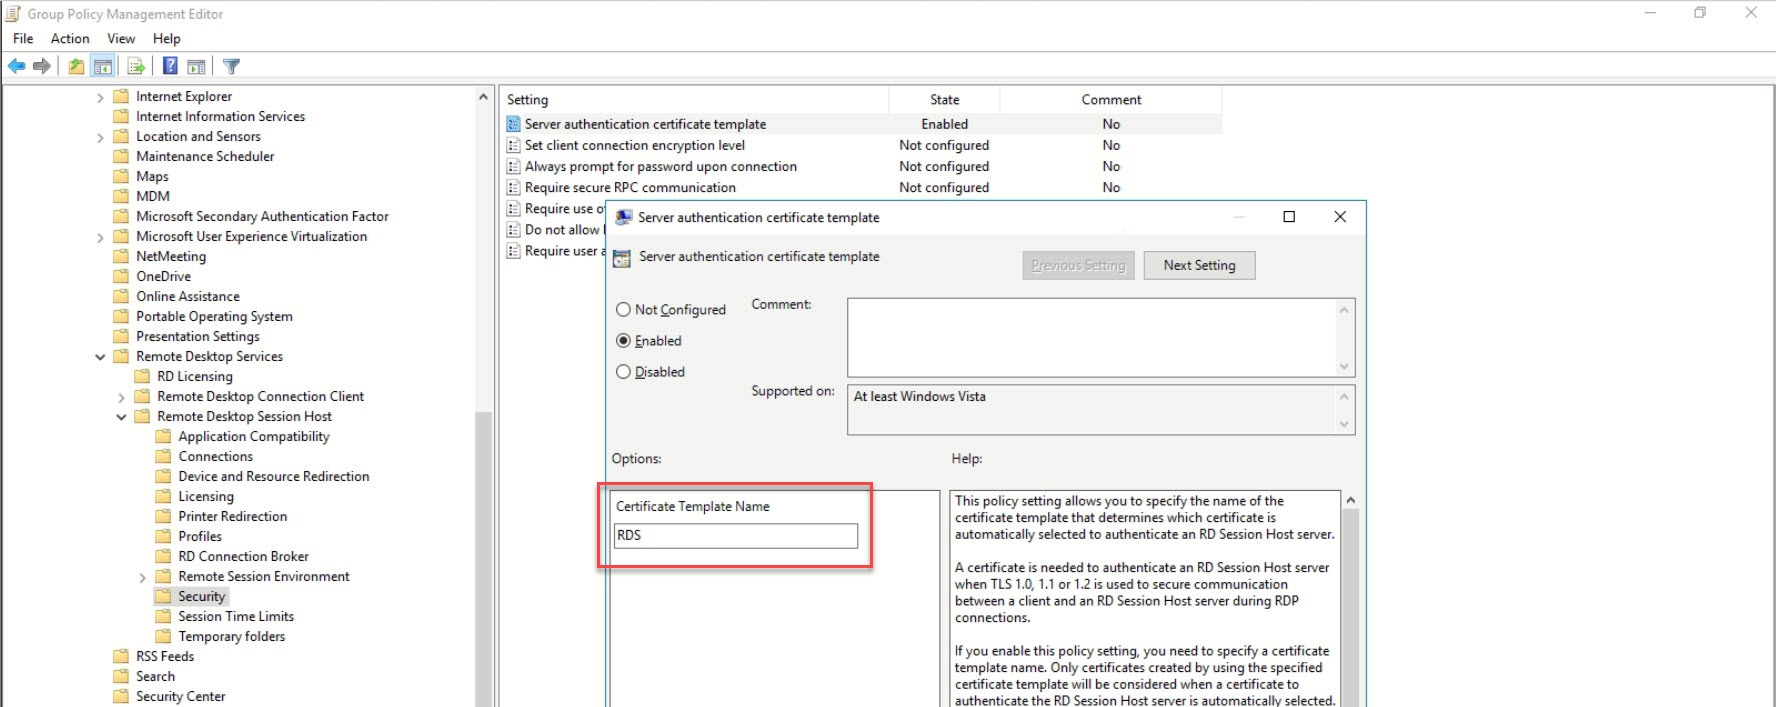
Open Server Authentication Certificate Template and for Certificate Template Name, enter the template name you created.
-
Navigate to
Computer Configuration\Policies\Administrative Templates\Windows Components\Remote Desktop Services\Remote Desktop Session Host\Security. -
Open
Require use of specific security layer for remote (RDP) connectionsand change the Security Layer to SSL.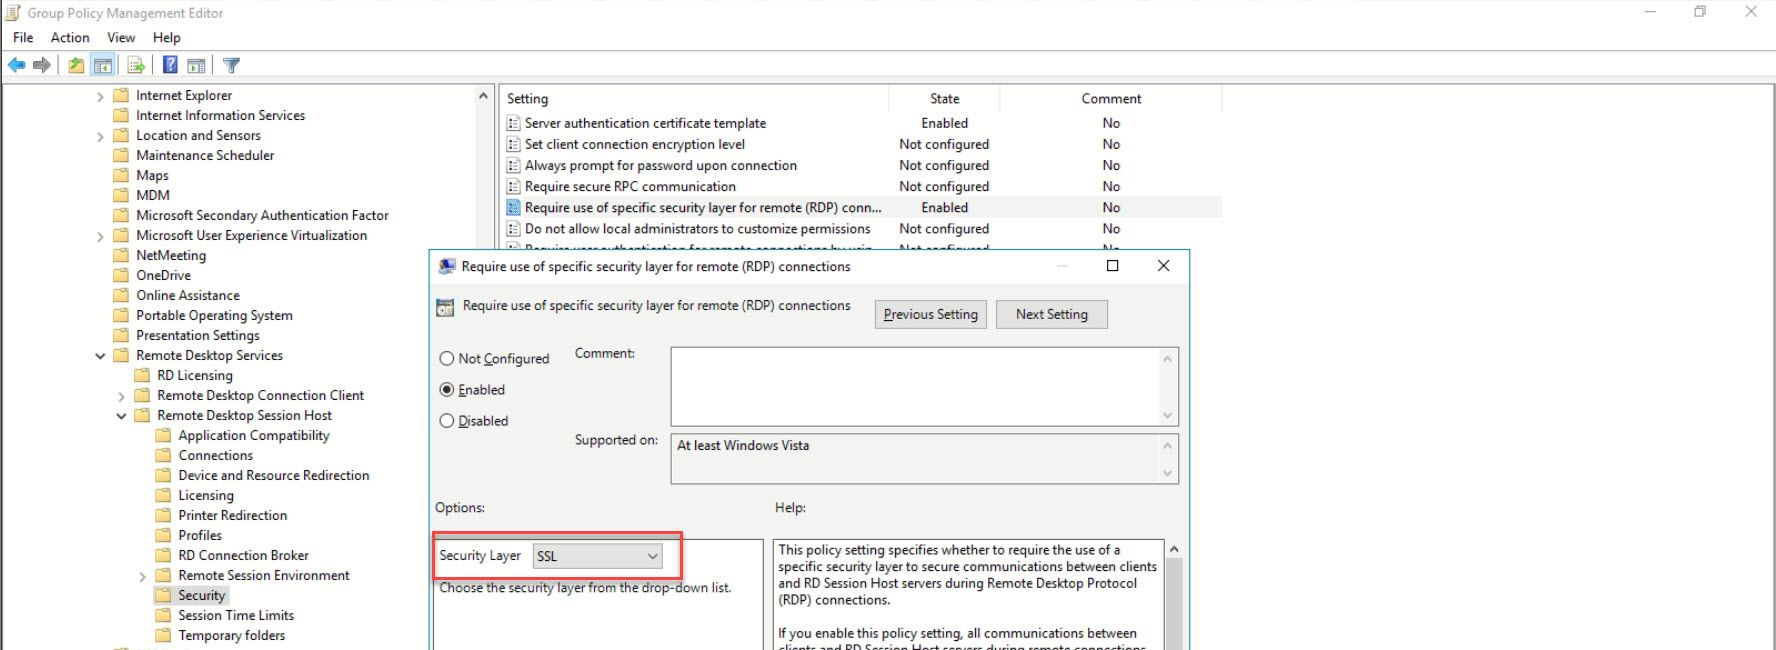
-
Run gpupdate /force, and restart Remote Desktop Services to immediately apply the settings.
Copy#Force GPO to update immediately
gpupdate /force#Restart RDS ServiceRestart-Service TermServiceThe RDS Authentication Certificate will be installed under Certificates (Local Computer).
To manually replace a RDP default self-signed certificate:
-
Open the Certificate Authority and modify the RDS template:
- On the Compatibility tab change the following:
- Certification Authority: Windows Server 2008 R2 or above.
- Certificate recipient: Windows 7 / Server 2008 R2 or above.
- On the Subject Name tab, select Supply in the request and the check Use subject information from existing certificate for autoenrollment renewal request.
- On the Compatibility tab change the following:
To request a RDS Certificate from the server:
-
Open Certificates - Local Computer using
certlm.mscand select Create Custom Request.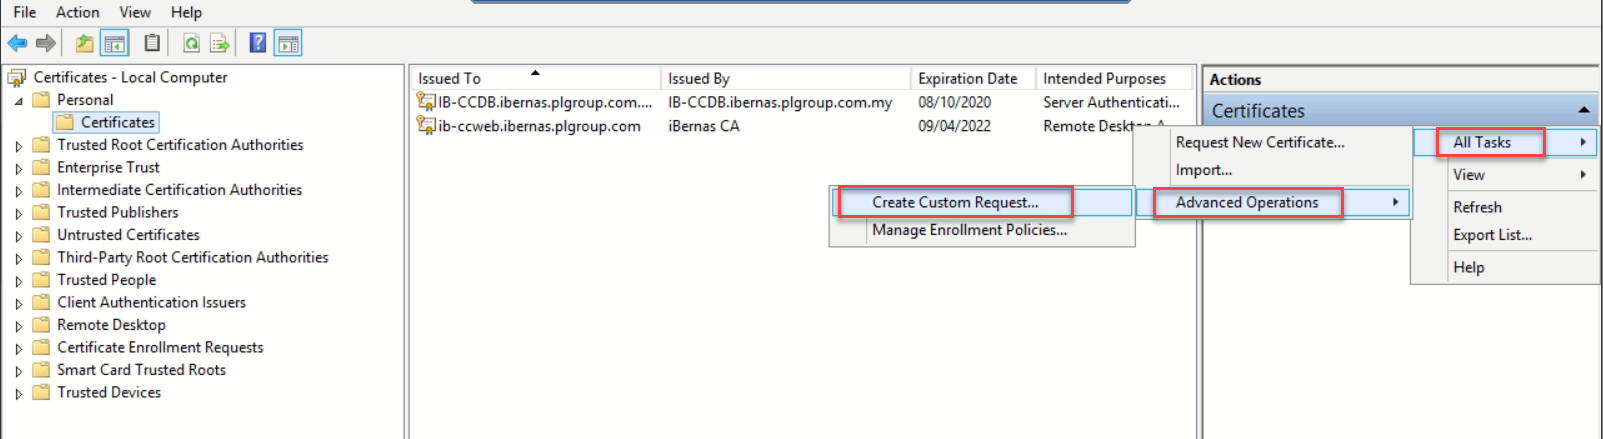
-
Set Template to RDS and click Next.
-
Click Properties.
-
For Subject name, set Type to Common Name and for Type, enter the server FQDN and click Add, then Apply.
-
On the General tab, specify a Friendly name to identify this certificate.
-
Choose the file path to save the offline request and click Finish.
-
Login to
http://CA_SERVER/certsrvand click the Request a certificate link. -
Click advanced certificate request.
-
Click Submit a certificate request by using a base-64-encoded CMC or PKCS #10 file, or submit a renewal request by using a base-64-encoded PKCS #7 file.
-
Paste the content of the offline request into Saved Request and set Certificate Template to RDS.
-
Click Download certificate.
-
Import the certificate to Certificates - Local Computer.

-
Verify the thumbprint of the RDS Certificate:
CopySet-Location Cert:\LocalMachine\my
Get-ChildItemThumbprint Subject---------- -------AA439E86EA877521C5A98460DBEBA70CC28C70E6 CN=ib-ccdb.ibernas.plgroup.com.my -
Replace the default self sign certificate with the RDS certificate:
Copy#Replace Certificate for RDS
wmic /namespace:\\root\cimv2\TerminalServices PATH Win32_TSGeneralSetting Set SSLCertificateSHA1Hash="AA439E86EA877521C5A98460DBEBA70CC28C70E6" -
Verify the RDS Certificate installation:
CopyGet-WmiObject "Win32_TSGeneralSetting" -Namespace root\cimv2\terminalservices -Filter "Termina
lName='RDP-tcp'"SecurityLayer : 2SSLCertificateSHA1Hash : AA439E86EA877521C5A98460DBEBA70CC28C70E6SSLCertificateSHA1HashType : 3Status :TerminalName : RDP-TcpTerminalProtocol : Microsoft RDP 8.0Transport : tcpUserAuthenticationRequired : 1WindowsAuthentication : 0PSComputerName : IB-CCDB -
The new RDS Certificate will now connect to the server via Remote Desktop.