Integrating with PingOne Enterprise
Integration prerequisites
-
Delinea PAS tenant.
-
PingOne for Enterprise tenant.
Configuring SAML Single Sign-On (SSO) for PingOne Enterprise
The following steps detail how to set up PingOne for Enterprise as an Identity Provider (IdP). In this configuration, Delinea PAS is the Service Provider (SP). Once configured you can access Delinea PAS from PingOne for Enterprise using SAML Single Sign-On (SSO).
To configure the PingOne tenant for SSO
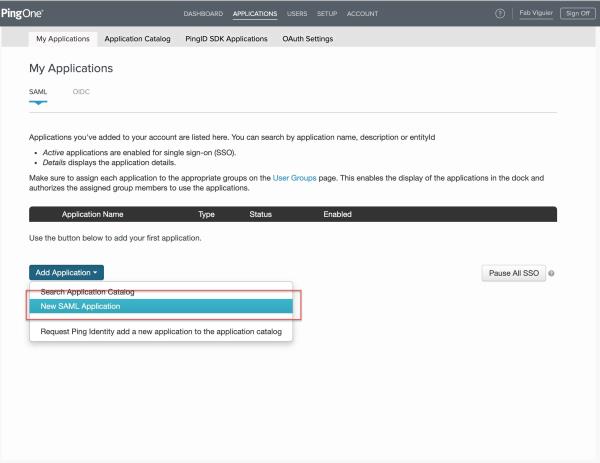
- In the PingOne tenant, navigate to Applications > Add Application > New SAML Application.
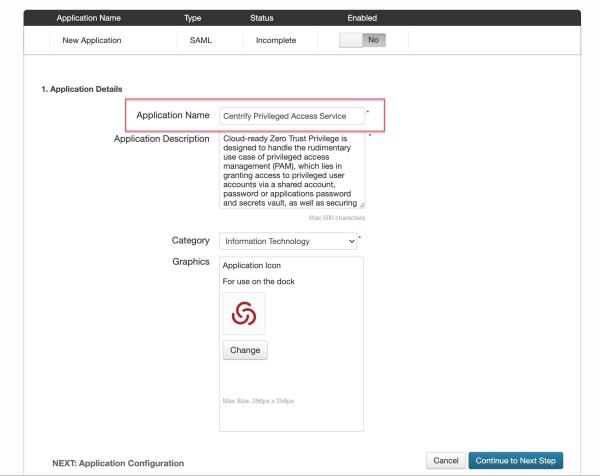
Name the Application Delinea Privileged Access Service” and (optionally) add description. upload logo, then click Continue to Next Step.
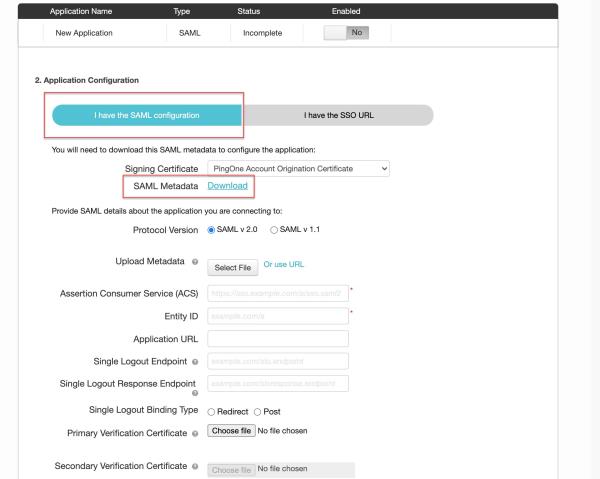
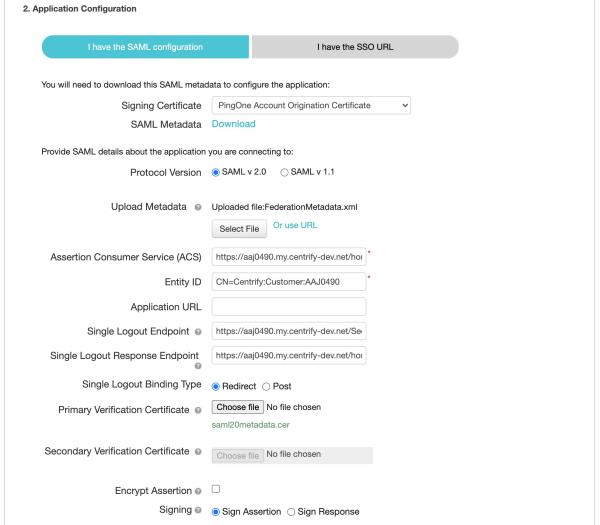
- Choose I have the SAML Configuration, then click the SAML Metadata download link (this saves an XML file named “saml2-metadata-idp.xml”).
-
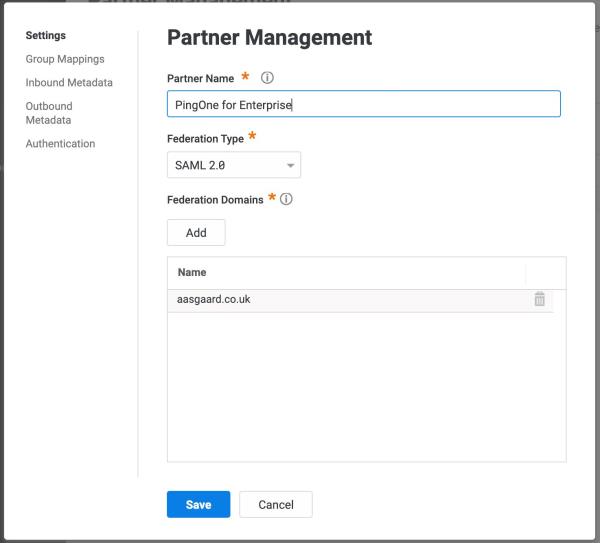
Navigate to the Delinea PAS tenant. In the Delinea PAS tenant. Navigate to Settings > Users > Partner Management then click Add.
-
Under Settings, name the Partner configuration “PingOne for Enterprise”, choose SAML 2.0 as a federation type and add the domain name(s) that can be used as suffix for SP-initiated login by users (will depend on your environment and authentication methods)
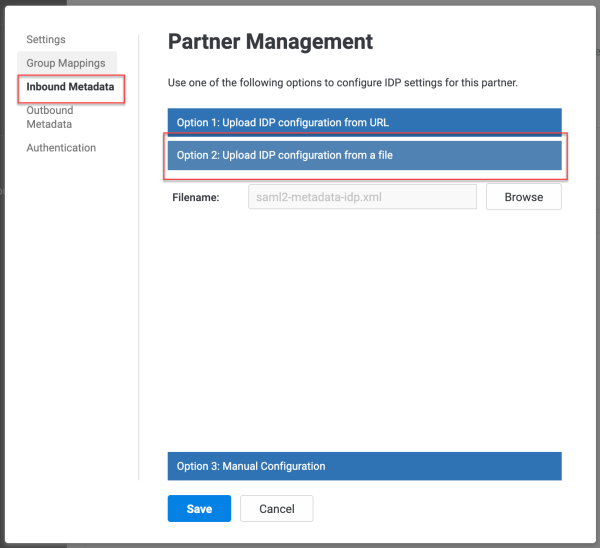
- Under Inbound Metadata, choose Option 2 and upload the XML file obtained from PingOne.
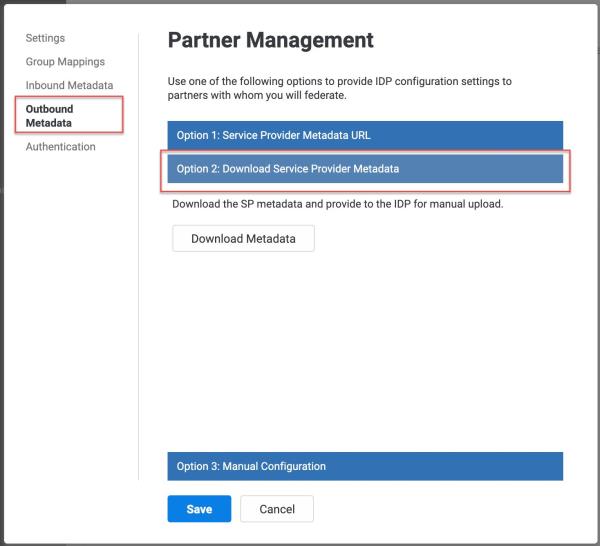
Under Outbond Metadata section, choose Option 2 and then Download the metadata file (this saves an XML file named “”).
-
Save the configuration.
-
Go back to the PingOne application configuration. On the PingOne tenant, continue the application configuration under the I Have the SAML Configuration section.
-
Upload the metadata file you obtained from the Delinea Partner configuration and Continue to Next Step.
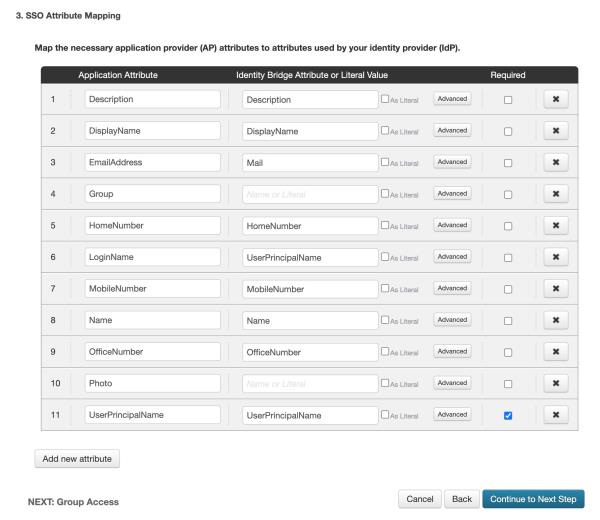
- Configure attribute mapping. This configuration may differ based on the directory used to login. In the example below, both PingOne and Delinea PAS are configured to authenticate Active Directory users from the same domain and therefore most attributes will match literally. You may need to change attribute name or use advanced mapping to adapt to your environment. Once you have concluded mapping, click Continue to Next Step.
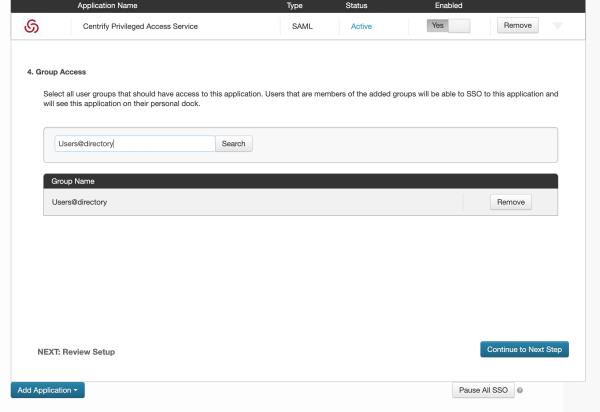
- Add group(s) that will be allowed to use the application (example: Users@directory is everyone on the Ping Directory) and click Continue to Next Step.
- Review and click Finish.
Configuring Delinea PAS as an Identity Provider
-
In the Delinea PAS tenant, navigate to Apps > Web Apps and click Add Web Apps.
-
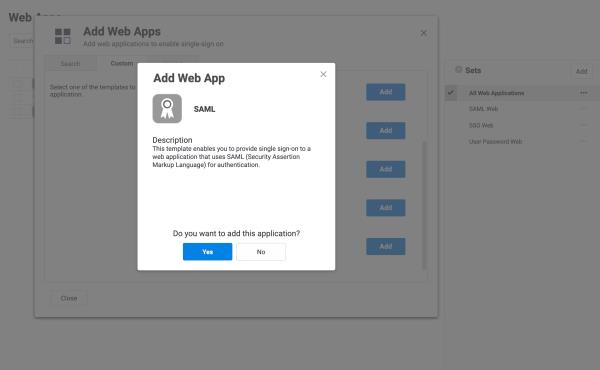
On the Custom tab, choose SAML template and click Add and confirm Yes.
- Under Settings tab, name the App “PingOne for Enterprise” and (optionally) add description and upload logo.

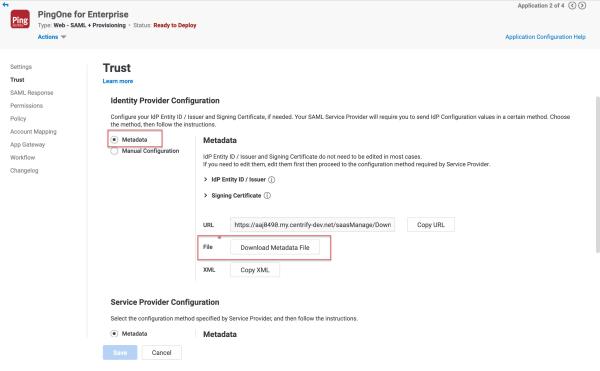
- Under the Trust tab and in the Identity Provider Configuration section, choose Metadata and click Download Metadata File (will saves an XML file named “PingOne for Enterprise - IdP Metadata.xml”).
-
Click Save.
-
Navigate back to the PingOne tenant. In the PingOne tenant, navigate to Setup and either Add a new Identity Repository or change the existing one.
-
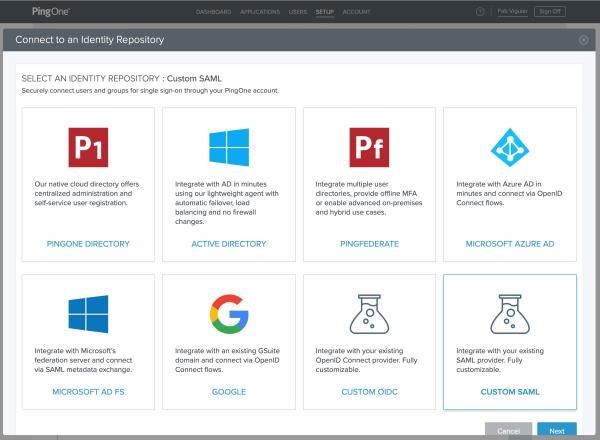
Select Custom SAML as the Identity Repository type and click Next.
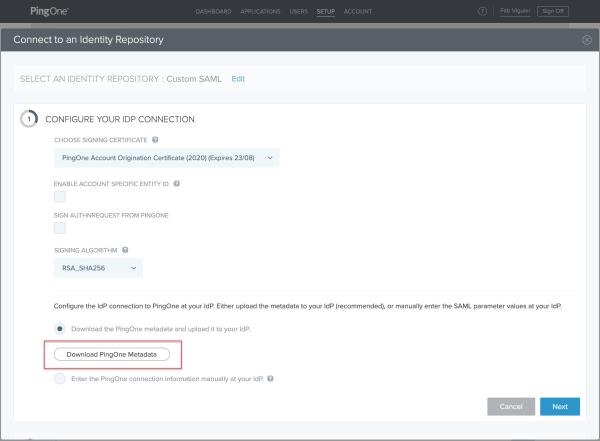
- Under Configure Your IDP Connection, click Download PingOne Metadata then Next (this saves an XML file named “pingone-metadata.xml”).
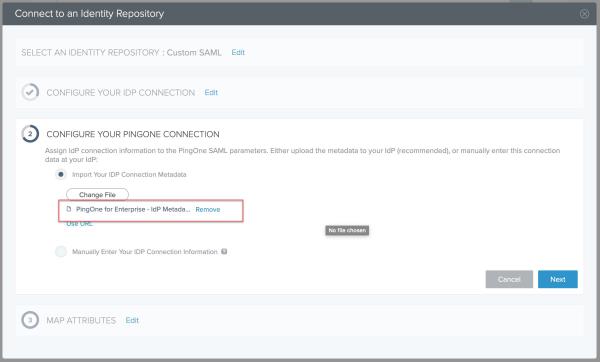
- Under Configure Your PingOne Connection , import the IdP Metadata file named “PingOne for Enterprise - IdP Metadata.xml” and click Next.
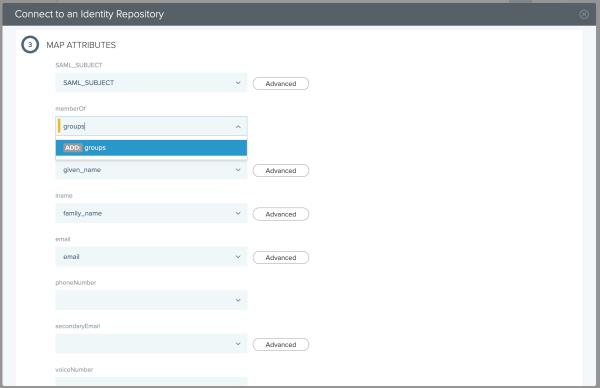
- Under the Map Attributes section, add a variable named “groups”. You can add other mapping attributes based on your configuration needs.
-
Click Save.
-
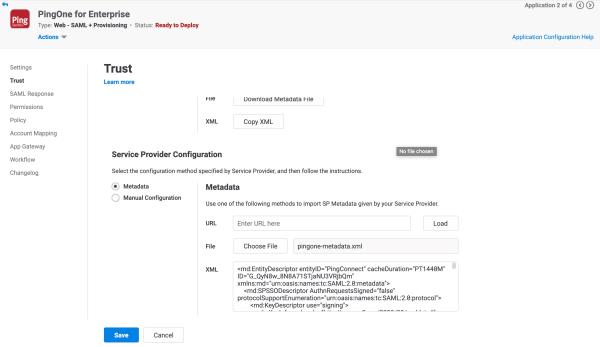
Navigate back to the Delinea PAS tenant. In the Delinea PAS tenant, navigate to Apps > Web Apps and edit the “PingOne for Enterprise” application setting.
-
Under Trust and in the Service Provider Configuration section, choose Metadata and click Choose File, upload the file named “pingone-metadata.xml”.
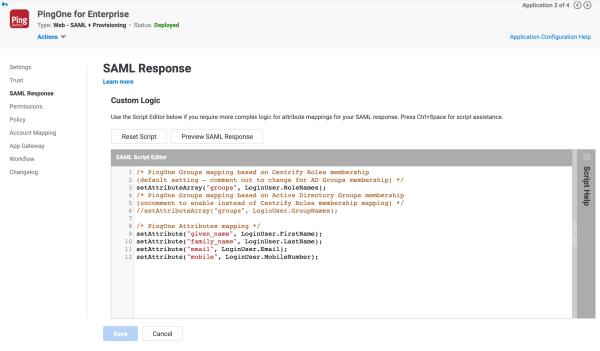
- Under SAML Response, and the Custom Logic section, edit the SAML script. The sample below is provided as an example, you may want to add other attributes if you modified the Map Attributes list under PingOne configuration.
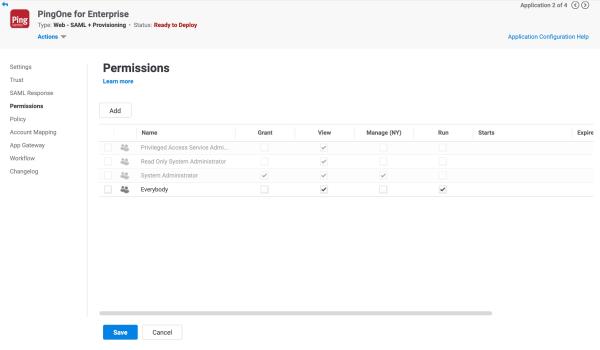
- Under Permissions, add the list of wsers and/or roles that have permissions to launch the application (use of a role should be always preferred for ease of access management).
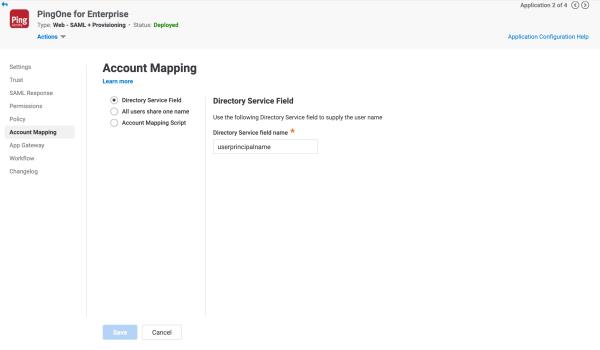
- Under Account Mapping, choose how the user will be recognized under PingOne for Enterprise. The default to UserPrincipalName when using Active Directory could be using email or any other value that suits your environment (this value should be unique).