[title]: # (Setting up Security Assertion Markup Language (SAML)) [tags]: # (integrations,Okta) [priority]: # (32)
Setting Up Security Assertion Markup Language (SAML)
Configuring Delinea Privileged Access Service SAML
To configure Delinea for SAML, perform the following steps:
-
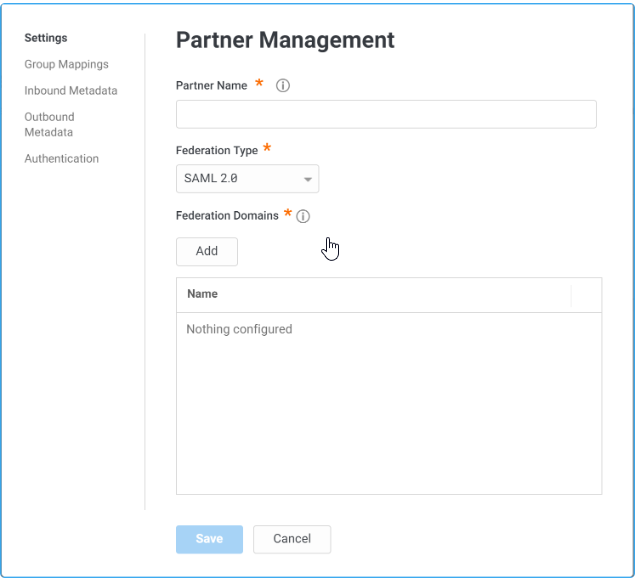
Open a browser tab or window to a Delinea PAS and navigate to Settings > Users > Partner Management and click Add.
-
On the main Settings tab, enter values in the following fields:
-
Partner Name Okta.
-
Federation Type SAML 2.0.
-
Under Federation Domains, click Add, enter the domain for users and click Add again.
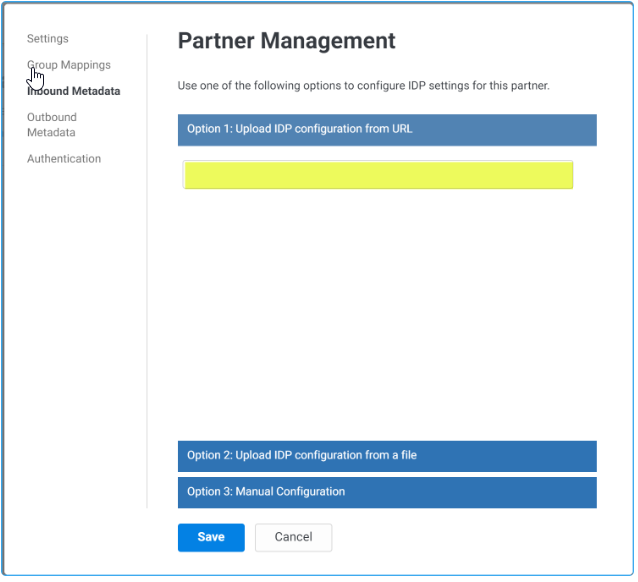
- Select Inbound Metadata, provide a dummy IDP for now and do not save.
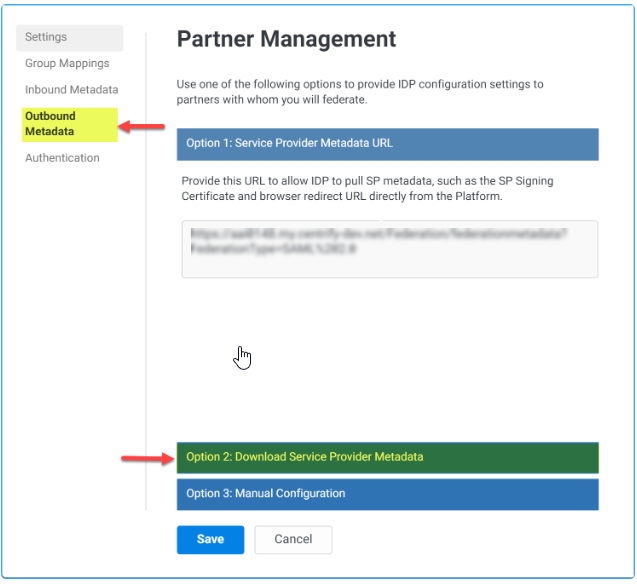
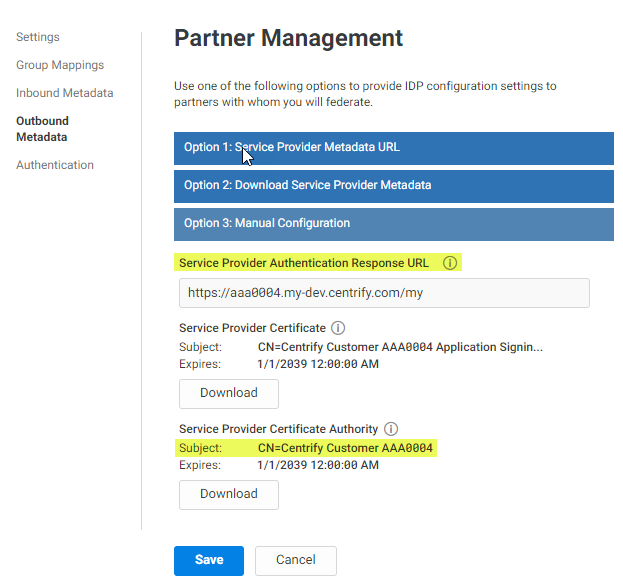
- Select the Outbound Metadata tab and choose Option 2: Download Service Provider Metadata.
-
Click __Download Metadata__and open the downloaded XML file in a text
editor.
This file will be used below, when you configure Okta SAML.
-
Search for the XML tag EntityDescriptor and note the value of the entityID parameter.
-
Search for the XML tag AssertionConsumerService, and note the value of the Location parameter.
Do not click Save, continue with remaining configuration steps as detailed below.
Configuring Okta SAML
To configure Okta SAML, perform the following steps:
-
Open a new browser tab or window and navigate to the Okta dashboard. Navigate to Directory > Groups.
-
Add groups to use for granting rights within Delinea PAS.
-
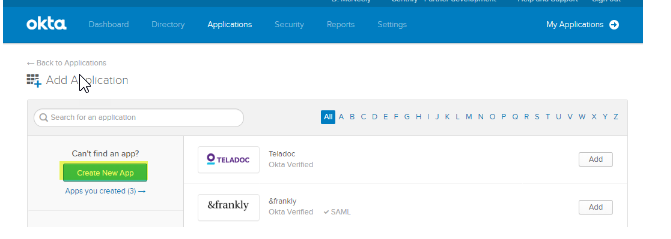
Select the Applications tab, click Add Application and click Create New App, as seen below.
-
Choose Web application, select SAML 2.0, and click Create.
-
Enter the App name Delinea Privilege Access Service.
-
Upload the Delinea logo.
- Going back to the Delinea PAS instance, copy the highlighed values:
- Click Save.
-
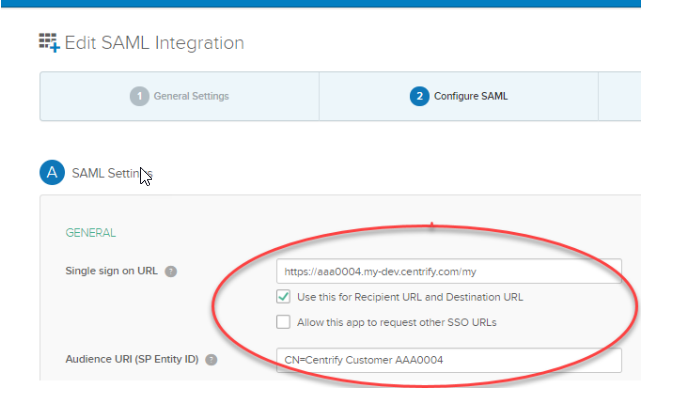
Enter the Single sign on URL as the Delinea PAS tenant URL. For example, https://<tenantid>.my.centrify.net/home.
-
Check the box for "Use this for Recipient URL and Destination URL."
Do not check the box for "Allow this app to request other SSO URLs."
-
Using the entityID value from the downloaded XML file, enter Audience URI. For example, CN=Centrify:Customer:<tenant_id>.
-
Click Show Advanced Settings.
-
Change Honor Force Authentication to Yes.
-
In the Attribute Statements section, enter the following name-value pair:
-
Name=UserPrincipalName
-
Value set to user.email.
-
In the Group Attribute Statement section, enter the following name-value pair:
-
Name=Group
-
Filter Starts With Delinea or name of Groups created in the first step
-
-
Click Next. Select the desired options for the support questions. Click Finish.
-
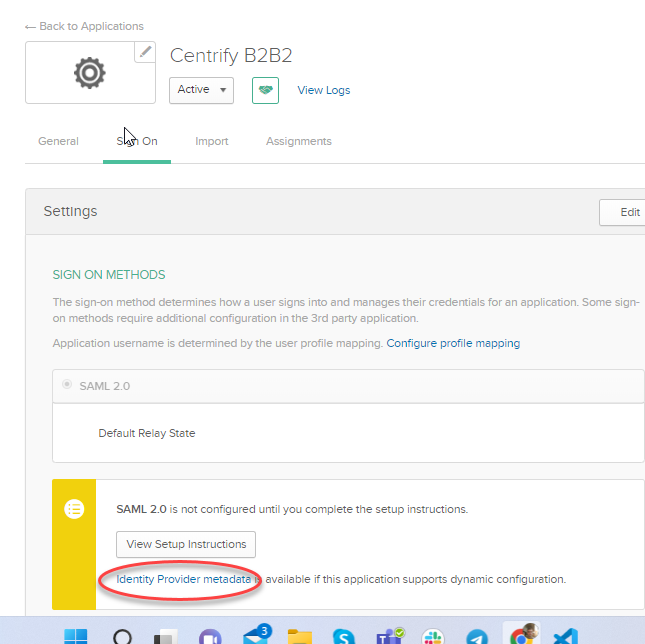
Select the Delinea application, then select the Sign On tab.
-
Click the Edit button. Set the Application username format to Email.
-
Click the Save button.
-
Right-click Identity Provider metadata link and save the XML file containing the Okta certificate.
-
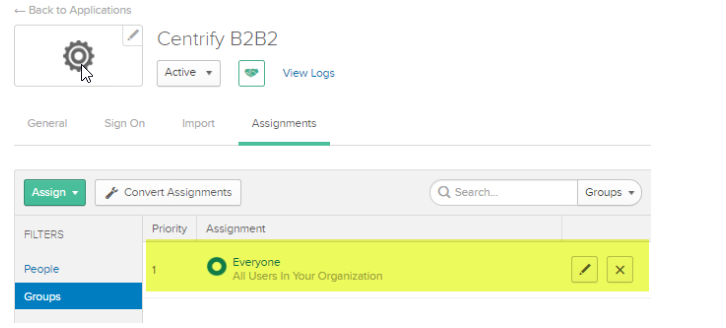
Click the Assignments tab.
-
Grant user and group rights to access/use the Delinea PAS application.
-
Make sure the users are also a member of one of the Okta Groups for
permissions within Delinea PAS.
Confirming Delinea SAML Configuration
To confirm Delinea SAML configuration, perform the following steps:
-
Return to the Delinea PAS tenant browser, where you left off with Setting Up Security Assertion Markup Language (SAML).
-
Select Inbound Metadata tab, click Option 2: Upload IDP Configuration from a file. Select the Okta certificate file downloaded above and click Save.
-
Upload the XML file containing the Okta certificate.
-
Select the Group Mappings tab.
-
Map the Okta group names to a group name for the IDP.
-
Click Save.