Setting Up Security Assertion Markup Language (SAML)
To integrate Privileged Access Service and Microsoft Azure Active Directory, review and perform the following steps:
-
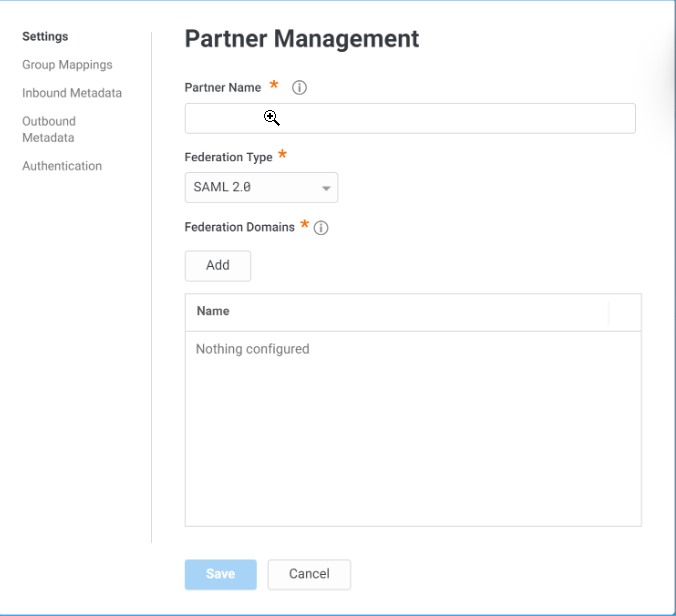
Open a browser tab or window to a {Company} PAS and navigate to Settings > Users > Partner Management and click Add.
-
On the main Settings tab, enter values in the following fields:
-
Partner Name Azure.
-
Federation Type SAML 2.0.
-
Under Federation Domains, click Add, enter the domain for users and click Add again.
You are about to pivot to the Microsoft Azure Active Directory. Do not close this window; you will return to it to finish the setup later.
-
-
Open another browser and use the Microsoft Entra admin center as an administrator to set up a new enterprise application that will federate with {Company}.
Follow the steps in Add an enterprise application on the Microsoft Learn site.
-
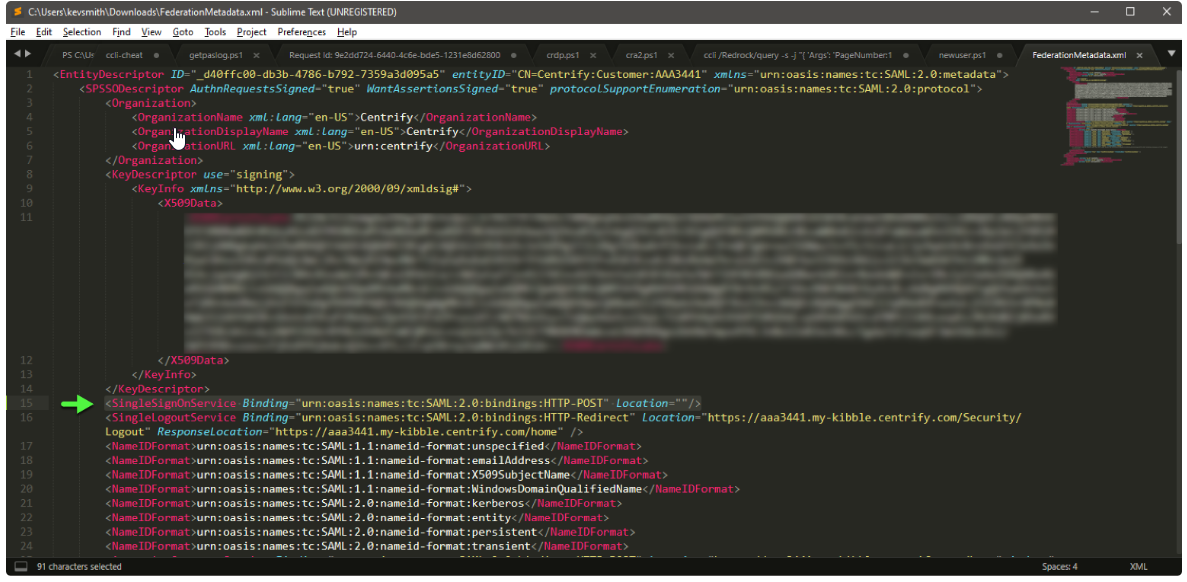
Bring back up the Delinea Partner add page you still have open. In the Partner Management window, select the Outbound Metadata tab and choose Option 2: Download Service Provider Metadata. Save the file.

-
Edit the FederationMetadata.xml file by inserting the following line between
</KeyDescriptor>and<SingleLogoutService>:<SingleSignOnService Binding="urn:oasis:names:tc:SAML:2.0:bindings:HTTP-POST" Location=""/>
-
Save the file.
-
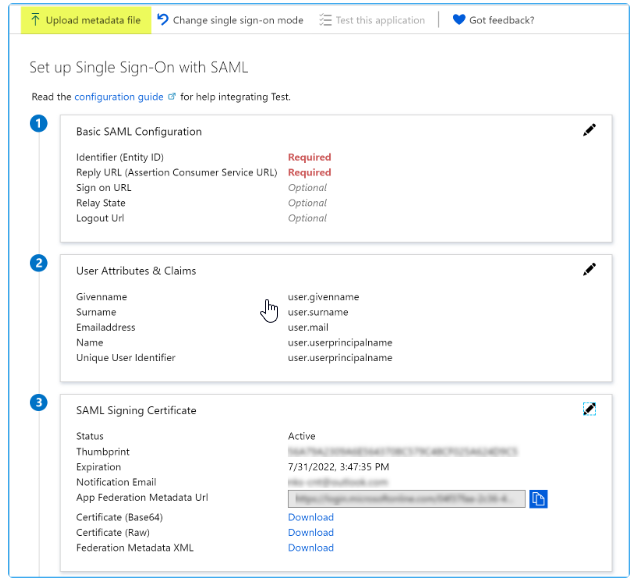
Go back to the Microsoft Entra admin center page, click Upload metadata file and upload the file you just downloaded and saved.
-
Enable SAML single sign-on for the new enterprise application you created in step 3.
Follow the steps at Enable SAML single sign-on for an enterprise application on the Microsoft Learn site.
-
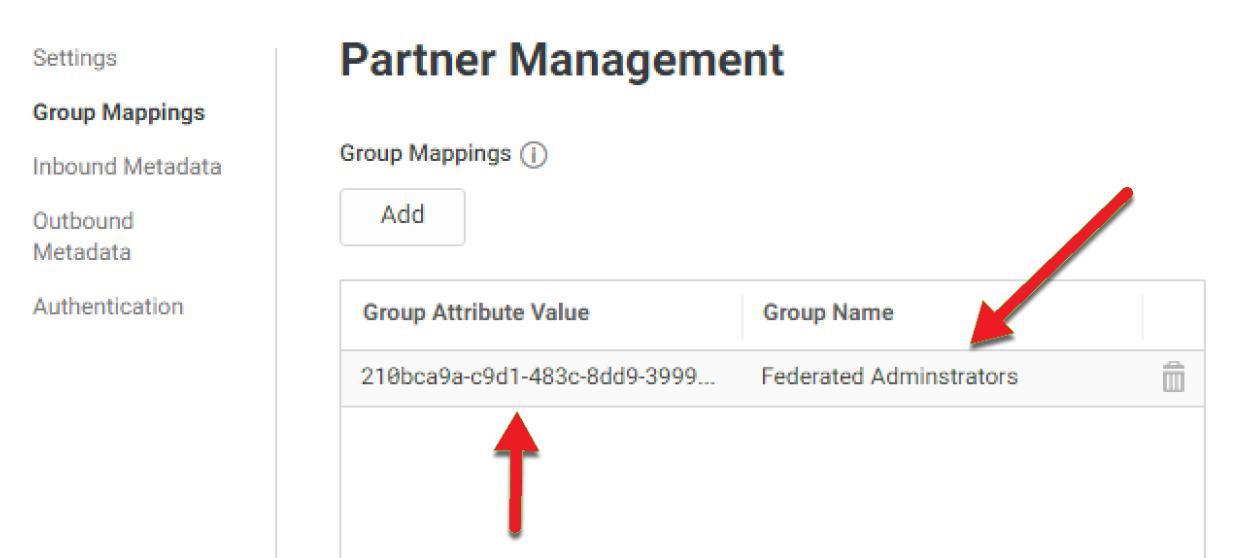
Navigate back to the Delinea PAS tenant. Navigate to Partner Management and add the group mapping using the ObjectId as the Group Attribute Value and a Group Name of your choice:
-
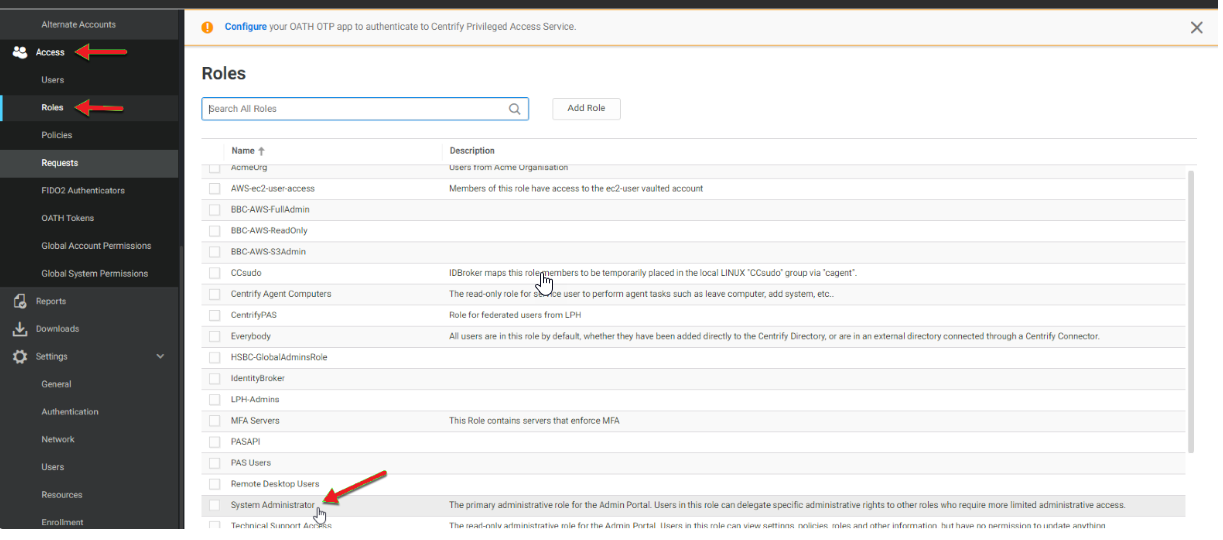
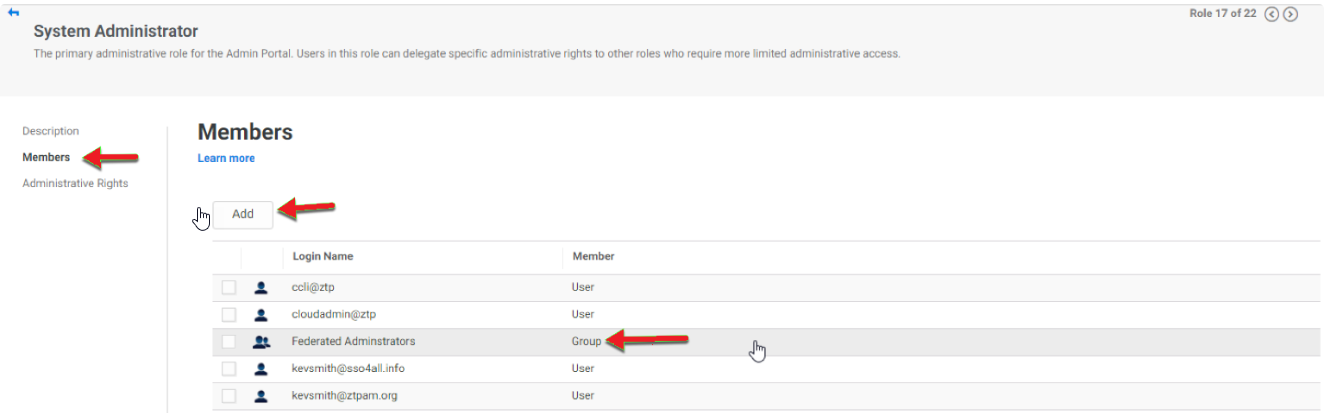
In Delinea PAS, add the Group Name to System Administrator. Navigate to Access > Roles and choose system administrator:
-
Click Members and add the group name you just added:
- Save the configuration.