Adding and Configuring the Generic Browser Application
To add and configure a generic browser extension application:
-
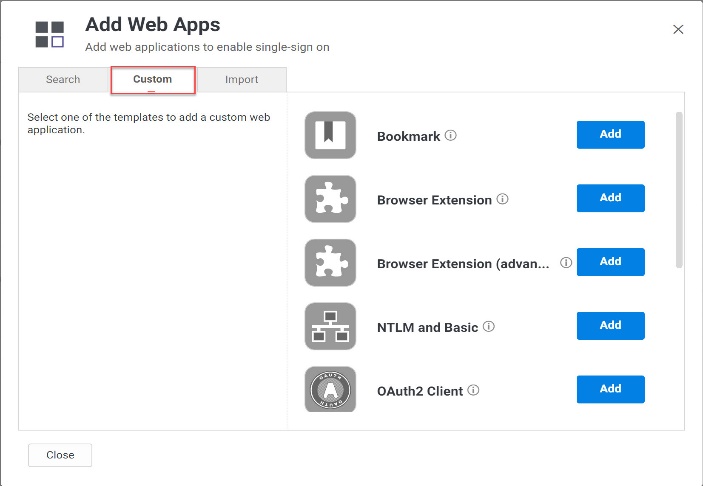
In Admin Portal, click Apps > Web Apps. Click Add Web Apps. The Add Web Apps screen appears.
-
Click Custom. On the Custom tab, next to the Browser Extension application, click Add.
-
On the Add Web App screen, click Yes to add the application. The Admin Portal adds the application.
-
Click Close to exit the Application Catalog.
-
On the Web Apps page, choose the Browser Extension app you just added.
-
On the Description page, select if you'd like custom name and description for each language. Additionally, add the name, description, category, and logo for the application. For some applications, the name cannot be modified.
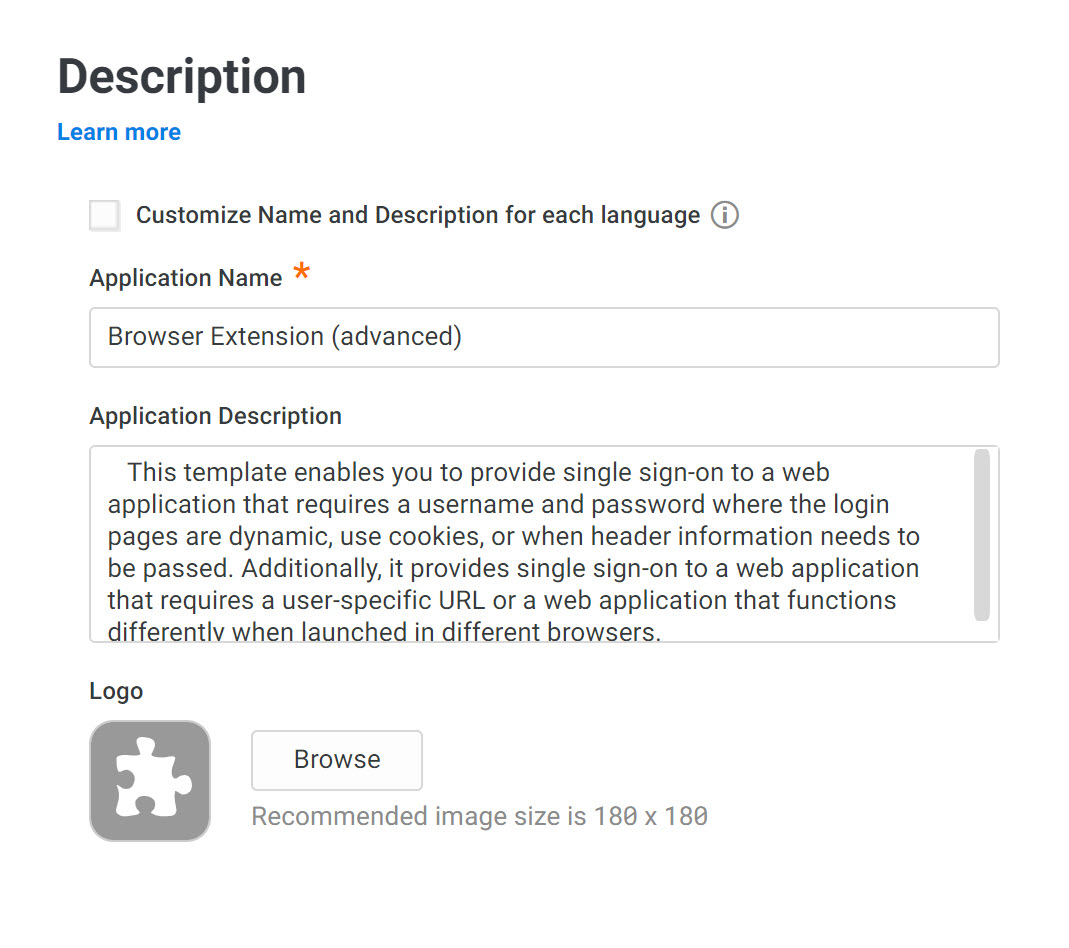
Because this is a generic or custom application, it’s recommended to give this application a unique name.
-
On the Permissions page, select the role(s), groups, and/or users that have access to the application.
-
(Optional) On the Policy page, specify additional authentication controls for this application. Here, you can add rules.
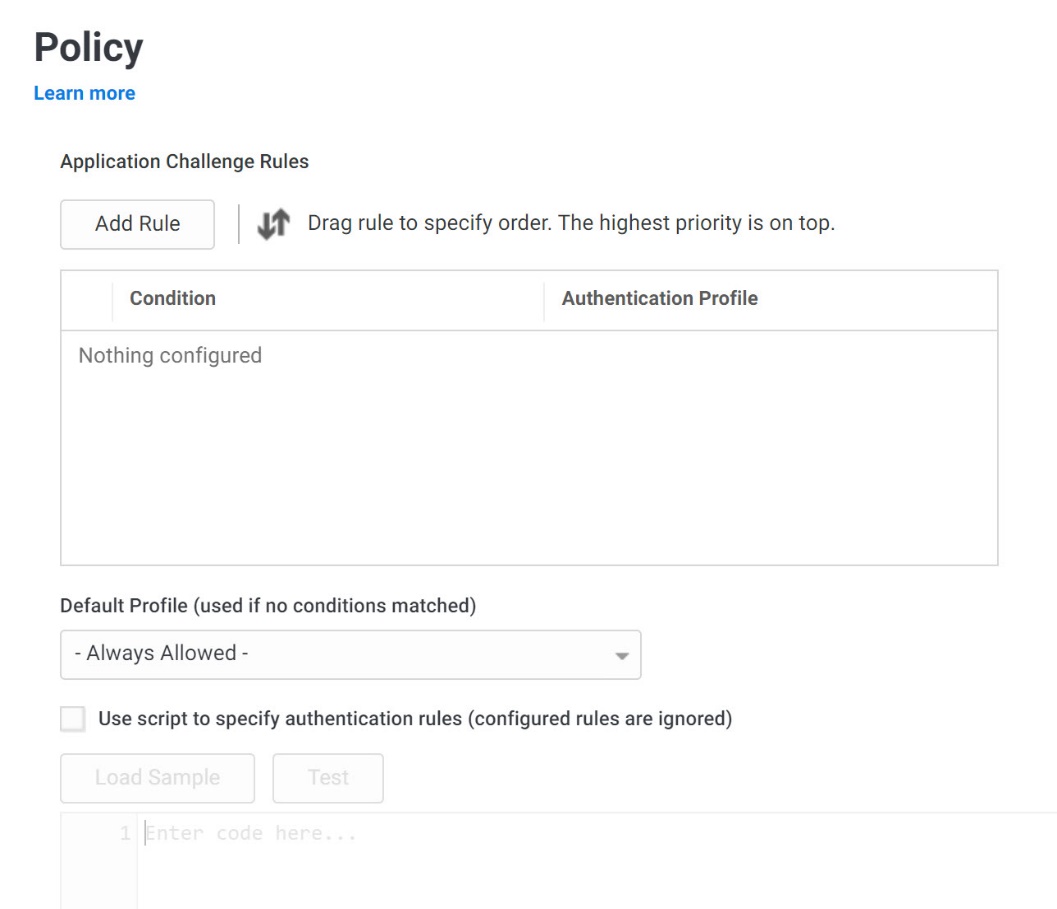
To add a rule:
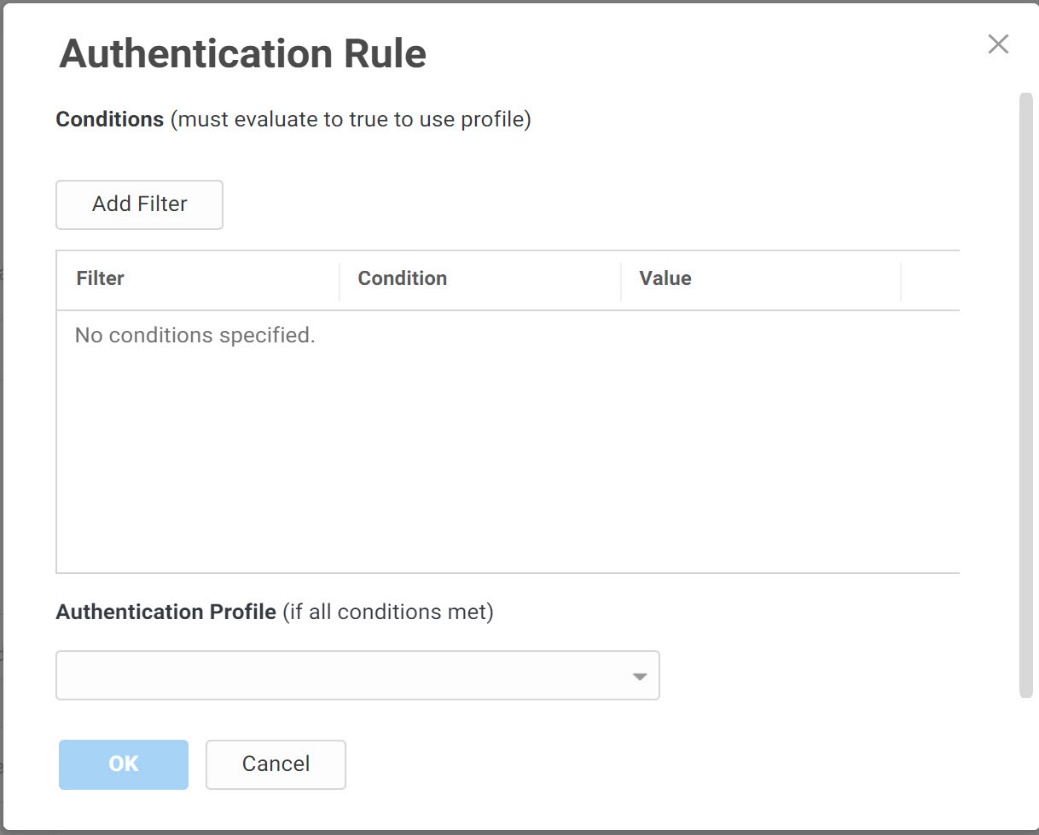
- Click Add Rule. The Authentication Rule window displays.
-
Click Add Filter on the Authentication Rule window.
-
Define the filter and condition using the drop-down boxes. For example, you can create a rule that requires a specific authentication method when users access the Privileged Access Service from an IP address that is outside of your corporate IP range. Supported filters are:
Filter Description IP Address The authentication factor is the computer’s IP address when the user logs in. This option requires that you have configured the IP address range in Settings, Network, Corporate IP Range. Identity Cookie The authentication factor is the cookie that is embedded in the current browser by the Delinea PAS after the user has successfully logged in. Day of Week The authentication factor is the specific days of the week (Sunday through Saturday) when the user logs in. Date The authentication factor is a date before or after which the user logs in that triggers the specified authentication requirement. Date Range The authentication factor is a specific date range. Time Range The authentication factor is a specific time range in hours and minutes. Device OS The authentication factor is the device operating system. Browser The authentication factor is the browser used for opening the Delinea PAS. Country The authentication factor is the country based on the IP address of the user computer. Risk Level The authentication factor is the risk level of the user logging on to user portal. For example, a user attempting to log in to Delinea PAS from an unfamiliar location can be prompted to enter a password and text message (SMS) confirmation code because the external firewall condition correlates with a medium risk level. This Risk Level filter, requires additional licenses. If you do not see this filter, contact Delinea PAS support. The supported risk levels are: Non Detected -- No abnormal activities are detected. Low -- Some aspects of the requested identity activity are abnormal. Remediation action or simple warning notification can be raised depending on the policy setup. Medium -- Many aspects of the requested identity activity are abnormal. Remediation action or simple warning notification can be raised depending on the policy setup. High -- Strong indicators that the requested identity activity is anomaly and the user's identity has been compromised. Immediate remediation action, such as MFA, should be enforced. Unknown -- Not enough user behavior activities (frequency of system use by the user and length of time user has been in the system) have been collected. Managed Devices The authentication factor is the designation of the device as “managed” or not. A device is considered “managed” if it is managed by Delinea PAS, or if it has a trusted certificate authority (CA has been uploaded to tenant). For the Day/Date/Time related conditions, you can choose between the user’s local time and Universal Time Coordinated (UTC) time. -
-
Click the Add button associated with the filter and condition.
-
Select the profile you want applied if all filters/conditions are met in the Authentication Profile drop-down.
The authentication profile is where you define the authentication methods. If you have not created the necessary authentication profile, select the Add New Profile option. See Creating Authentication Profiles. -
Click OK.
-
(Optional) In the Default Profile (used if no conditions matched) drop-down, you can select a default profile to be applied if a user does not match any of the configured conditions.
If you have no authentication rules configured and you select Not Allowed in the Default Profile dropdown, users will not be able to log in to the service. -
Click Save.
If you have more than one authentication rule, you can prioritize them on the Policy page. You can also include JavaScript code to identify specific circumstances when you want to block an application or you want to require additional authentication methods. For details, see Data That You Can Use in a Policy Script.Note: If you left the Apps section of Admin Portal to specify additional authentication control, you will need to return to the Apps section before continuing by clicking Apps at the top of the page in Admin Portal.
-
On the Account Mapping page, configure how the login information is mapped to the application’s user accounts.
The options are as follows:
-
Directory Service Field: Use this option if the user accounts are based on user attributes. For example, specify an Active Directory field such as mail or userPrincipalName or a similar field from Delinea Directory. For Web - User Password applications, selecting this option allows an additional option to let Active Directory users log in using Active Directory credentials.
-
Use the login password supplied by the user (Active Directory users only) option for every Web - User Password application that you want users to log in to using Active Directory credentials.
-
All users share one name: Use this option if you want to share access to an account but not share the user name and password. For example, some people share an application developer account.
-
Prompt for user name: Use this option if you want users to supply their own user name and password. The first time a user launches the application, they enter their login credentials for that application. The Delinea PAS stores the user name and password and the next time the user launches the application, the Delinea PAS logs the user in automatically.
-
Account Mapping Script: You can customize the user account mapping here by supplying a custom JavaScript script. For example, you could use the following line as a script:
LoginUser.Username = LoginUser.Get('mail')+'.ad';
-
-
The above script instructs the Delinea PAS to set the login user name to the user’s mail attribute value in Active Directory and add ‘.ad’ to the end. So, if the user’s mail attribute value is Adele.Darwin@acme.com then the Delinea PAS uses Adele.Darwin@acme.com.ad. For more information about writing a script to map user accounts, see the User-Password Application Scripting.
-
On the Advanced tab, configure how to submit the login and other authentication information for the application.
Browser Extension Variable field Description Examples Host Name Suffix Not used for now — for future use. If you don’t specify this field, the Delinea PAS populates this with the last part of the domain of the URL. For example, if the URL is signin.acme.com and you leave the host name suffix blank, the Admin Portal populates the host name suffix with acme.com. User Name The CSS Selector that matches the user name element. input#userid input[name=”username’] Password The CSS Selector that matches the password element. input#pass input#id_password Submit The CSS Selector that matches the submit button that transmits the authentication information for processing. input#sgnBt input[value="Log In"] input.button-green Form The CSS Selector to select the HTML form element. This variable is optional, because not all web pages use forms. If the login page does use a form, you do need to specify it here in order for SSO to work. form#login_form form.niceform Additional Login Field This CSS selector is for the additional login field, such as company ID. input:imp Additional Login Field Value For applications that require an additional login field, you must specify the value. Users cannot enter the value. 1234 Selector Timeout This optional field is for advanced users only. Use this field to indicate the number of milliseconds to wait for the expected input selectors to load before timing out on failure. A zero or negative number means no timeout. 1, 2, 3,... = number of milliseconds 0 or negative number = no timeout Order This optional field is for advanced users only. Use this field to specify the order of login if it is not username, password, and submit. Tip: Make sure that your selectors are unique within the page that you’re accessing. Otherwise, problems or data collisions can occur.
-
(Optional) Click App Gateway to allow users to securely access this application outside of your corporate network. For detailed configuration instructions, see Configuring App Gateway.
-
(Optional) On the Changelog page, you can see recent changes that have been made to the application settings, by date, user, and the type of change that was made.
-
(Optional) Click Workflow to set up a request and approval work flow for this application.
-
Click Save.