JIRA Server (On-Premise)
With Delinea as your Privileged Access Service, you can configure JIRA Server (On-Premise) for either or both IdP-initiated SAML SSO and SP-initiated SAML SSO (for SSO access directly through the JIRA Server web application). Enabling both methods ensures that users can log in to JIRA Server in different situations such as clicking through a notification email.
After you configure SAML SSO, JIRA username-password login pages will not function. It will display a login error even if the correct username and password are entered.
JIRA does not support SAML, but it accepts a custom plugin for individual companies to modify the authentication process to their own needs, including implement Single Sign-On. A custom plugin is a set of .jar files that are implemented using Atlassian's Seraph library, and will be deployed in the JIRA Server. A system administrator must change the JIRA configuration to use the plugin.
With Delinea JIRA SAML plugin deployed in JIRA Server, any unauthenticated access to JIRA resources will be redirected to Delinea Admin Portal for authentication. After that, users will be redirected back to the requested resources.
Delinea JIRA SAML plugin supports JIRA Server versions 6.x and 7.x.
If JIRA is the first application you are configuring for SSO through Privileged Access Service, read these topics before you get started:
JIRA Server SSO requirements
Before you configure the JIRA Server web application for SSO, you need the following:
-
A JIRA Server (On-Premise).
-
A system administrator account to the JIRA Server computer to deploy and configure the plugin.
Configuring JIRA Server in Admin Portal
The following steps are specific to the JIRA application and are required in order to enable SSO for JIRA. For information on optional configuration settings available in the Delinea Admin Portal, see Optional Configuration Settings.
To add and configure the JIRA Server application in Admin Portal:
-
In Admin Portal, click Apps, then click Add Web Apps.
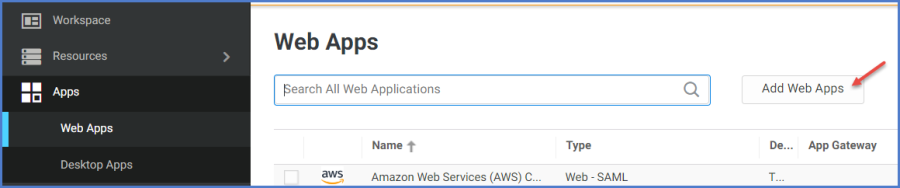
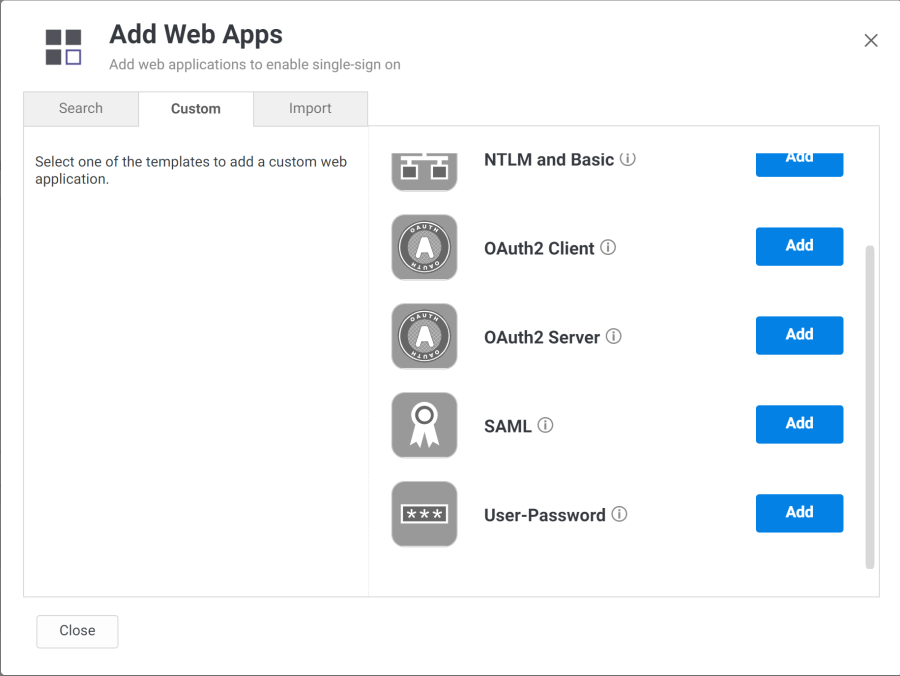
The Add Web Apps screen appears.
-
On the Search tab, enter the partial or full application name in the Search field and click the search icon.
-
-
Next to the application, click Add.
-
In the Add Web App screen, click Yes to confirm.
Admin Portal adds the application.
-
Click Close to exit the Application Catalog.
The application that you just added opens to the Application Settings page.
The description of how to choose and download a signing certificate in this document might differ slightly from your experience. See "Choose a Certificate File" for the latest information.
-
Configure the following:
Field Set it to What you do Assertion Consumer Service URL Your JIRA Server host and port number. -
Click Account Mapping in the Admin Portal and see Map User Accounts for configuration details.
If your JIRA Server is hosted over HTTP, change https to http. |
-
In Account Mapping:
-
Select Use the following Directory Service field to supply the user name.
-
In Directory Service field name, replace userprincipalname with your company’s Active Directory field name that stores the JIRA Employee ID.
-
Click Save.
For information on optional Delinea Admin Portal configuration settings that you may wish to customize for your app, see Optional Configuration Settings.
-
Downloading the Delinea JIRA SAML Plugin and Signing Certificate
To download the plugin and certificate:
-
Go to the Application Settings page for the JIRA Server app in Admin Portal.
-
Copy your IdP Issuer and save it where you can find it in the next step.
-
Copy your IdP Post URL and save it where you can find it in the next step.
-
Click Download Signing Certificate and save the .cer file where you can find it in the next step.
-
Click Download this plugin to be installed into your JIRA Server instance to download a .zip file containing the SAML plugin files, and save the file where you can find it in the next step.
Deploying and Configuring JIRA SAML Plugin in JIRA Server
This section requires a system administrator to place new files in the JIRA Server file system and modify JIRA configuration files. Note that this is a system administrator to the server hosting JIRA, not a JIRA (application) administrator.
These instructions assume:
-
JIRA on Windows.
-
JIRA installed as a Windows Service.
To deploy and configure the JIRA SAML plugin:
-
Access the server hosting JIRA.
-
Stop the JIRA application. For example, in Windows 7, go to Control Panel > Administrative Tools > Services, then right-click Atlassian JIRA the service and select Stop.
-
Copy the .cer signing certificate file downloaded in the previous steps and place it in:
<your-atlassian-directory>\JIRA.
-
Copy the .zip file downloaded in the previous steps and place it in a temporary location (any location other than where it will be moved to in the next few steps).
-
Extract the .zip file. The extracted contents are:
-
File: readme.txt
-
Directory: atlassian-jira
-
Directory: conf
-
-
Copy all the .jar files from the directory atlassian-jira\WEB-INF\lib and paste them in your JIRA directory at:
<your-atlassian-directory>\JIRA\atlassian-jira\WEB-INF\lib
-
Go to <your-atlassian-directory>\JIRA\atlassian-jira\WEB-INF\lib.
You will see there are two files named xmlsec-<x.x.x>.jar.
-
If your JIRA is version 6.1 or later, delete xmlsec-1.4.5.jar. Otherwise, delete xmlsec-1.1.0.jar.
-
Go to <your-atlassian-directory>\JIRA\lib.
-
Copy the following .jar files and paste them in <your-atlassian-directory>\JIRA\atlassian-jira\WEB-INF\lib:
-
jcl-over-slf4j-x.x.x.jar
-
slf4j-api-x.x.x.jar
-
slf4j-log4j12-x.x.x.jar
-
-
Copy the atlassian-jira\WEB-INF\classes directory and paste it in your JIRA directory at <your-atlassian-directory>\JIRA\atlassian-jira\WEB-INF\classes.
This will place two custom email template files in your JIRA directory:
-
<your-atlassian-directory>\JIRA\atlassian-jira\WEB-INF\classes\templates\email\html\centrify-usercreated-nopassword.vm
-
<your-atlassian-directory>\JIRA\atlassian-jira\WEB-INF\classes\templates\email\text\centrify-usercreated-nopassword.vm
-
-
Copy the catalina-saml.properties file in the conf directory, and paste it in your JIRA directory: <your-atlassian-directory>\JIRA\conf.
-
Use your favorite text editor to open <your-atlassian-directory>\JIRA\atlassian-jira\WEB-INF\classes\seraph-config.xml.
-
Find the following authenticator lines and comment out the one that is being used:
<authenticator class="com.atlassian.jira.security.login.JiraSeraphAuthenticator"/>
<authenticator class="com.atlassian.jira.security.login.SSOSeraphAuthenticator"/>.
-
Add this new authenticator line to seraph-config.xml:
<authenticator class="com.centrify.cloud.saas.jirasaml.SamlAuthenticator"/>
-
Save seraph-config.xml.
-
Open <your-atlassian-directory>\JIRA\atlassian-jira\WEB-INF\web.xml.
-
Find the last <servlet> defined.
-
Place your cursor below the last <servlet> defined, then copy/paste the following:
<!-- Centrify JIRA SAML -->
<servlet>
<servlet-name>samlServlet</servlet-name>
<servlet-class>com.centrify.cloud.saas.jirasaml.SamlServlet</servlet-class>
<init-param>
<param-name>defaultHomepage</param-name>
<!-- If you want SAML Users to land on a specific page, enter the URI after https://(jira-host)/ without
a slash in the front. For example, if you want SAML Users to land on the Issues page,
https://(jira-host)/issues, enter "issues" here as the param-value.
Leaving an empty string will bring a SAML User to the user's My JIRA Home page. -->
<param-value></param-value>
</init-param>
<init-param>
<param-name>idpIssuerName</param-name>
<param-value><!-- Copy IdP Issuer from Application Settings in Delinea and paste it here. --></param-value>
</init-param>
<init-param>
<param-name>idpCertFile</param-name>
<param-value><!-- Absolute file path to your signing certificate file --></param-value>
</init-param>
<init-param>
<param-name>audience</param-name>
<!-- After setting the audience value below, make sure you also set the same audience value in Admin Portal. -->
<param-value>JIRA</param-value>
</init-param>
<load-on-startup>1</load-on-startup>
</servlet>
-
Set the <param-value> of idpCertFile to the absolute file path to your signing certificate file. If you used the recommended path name in Step 3 and if your certificate file is named JIRA.cer, you would set <param-value> to:
<your-atlassian-directory>\JIRA\JIRA.cer.
As shown here:
<init-param>
<param-name>idpCertFile</param-name>
<param-value>C:\Program Files\Atlassian\JIRA\JIRA.cer<param-value>
</init-param>
-
Find the last <servlet-mapping> defined.
-
Place your cursor below the last <servlet-mapping> and copy/paste the following:
<!-- Centrify JIRA SAML -->
<servlet-mapping>
<servlet-name>samlServlet</servlet-name>
<url-pattern>/saml</url-pattern>
</servlet-mapping>
-
Save web.xml.
-
Open <your-atlassian-directory>\Atlassian\JIRA\conf\catalina-saml.properties in a text editor.
-
Open the catalina.properties file of your JIRA in a text editor. By default, the file is located at: <your-atlassian-directory>\JIRA\atlassian-jira\conf\.
-
Copy the contents of the catalina-saml.properties file and paste them at the end of your catalina.properties file.
-
Save catalina.properties.
-
Start the JIRA application. For example, in Windows 7, go to Control Panel > Administrative Tools > Services, then right-click Atlassian JIRA the service and select Start.
Wait a few minutes for the service to start. The new settings that you just configured will be used after JIRA starts.
-
Test and verify that your newly installed IdP-initiated SSO to JIRA works properly before proceeding.
Now that you have finished configuring the application settings in the Admin Portal and the JIRA application, users are ready to launch the application from the Admin Portal.
There are several optional configuration steps available:
(Optional) Configuring SP-initiated SSO for JIRA Server
If you also want to use SP-initiated SSO, complete the steps in this section.
After you configure SP-initiated SSO, JIRA username-password login pages will not function. For more information about what this means and what your options are with SP-initiated SSO, see (Optional) Closing the Back Door Login for SP-Initiated SSO for JIRA Server.
To configure SP-initiated SSO:
-
Stop the JIRA application. For example, in Windows 7, go to Control Panel > Administrative Tools > Services, then right-click Atlassian JIRA the service and select Stop.
-
In your favorite text editor, open <your-atlassian-directory>\JIRA\atlassian-jira\WEB-INF\web.xml.
-
Find the <filter> with the name JiraLastFilter.
-
Place your cursor above this <filter>, and copy/paste the following:
<!-- Centrify JIRA SAML -->
<filter>
<filter-name>samlFilter</filter-name>
<filter-class>com.centrify.cloud.saas.jirasaml.SamlFilter</filter-class>
<init-param> <!-- Required -->
<param-name>idpPostUrl</param-name>
<param-value></param-value>
</init-param>
<init-param> <!-- Required -->
<param-name>spIssuerName</param-name>
<param-value>JIRA</param-value>
</init-param>
<init-param> <!-- Required -->
<param-name>allowedURIs</param-name>
<param-value>
/saml,
/plugins/servlet/applinks/*,
/plugins/servlet/oauth/*,
/rest/*
</param-value>
</init-param>
</filter>
-
Set the <param-value> of idpPostUrl to the IdP Post URL that you copied from your JIRA Server SAML application in the previous steps.
-
Set the <param-value> of idpIssuerName to the IdP Issuer that you copied from your JIRA Server SAML application in the previous steps.
-
Find the <filter-mapping> with the name login.
-
Place your cursor below this <filter-mapping>, and copy/paste the following:
<!-- Centrify JIRA SAML -->
<filter-mapping>
<filter-name>samlFilter</filter-name>
<url-pattern>/*</url-pattern>
</filter-mapping>
-
Save web.xml.
-
Start the JIRA application. For example, in Windows 7, go to Control Panel > Administrative Tools > Services, then right-click Atlassian JIRA the service and select Start.
Wait a few minutes for the service to start. The new settings that you just configured will be used after JIRA starts.
After configuration for SP-initiated SSO is complete, the JIRA application is automatically ready to link to other Atlassian apps released in that have also been configured for SP-initiated SSO. For information about how to link the apps, see:
You can add additional paths to the list of <param-value> values for allowedURIs in the web.xml file for Atlassian apps released in Privileged Access Service Cloud 17.10 or later. It is important that you do not change the /saml <param-value>.
(Optional) Closing the Back Door Login for SP-Initiated SSO for JIRA Server
If you configure SP-initiated SSO, JIRA login pages are disabled and users run the risk of being locked out of JIRA. The only way that users can sign back in with their JIRA username and password after they have been locked out is to append the parameters os_username and os_password to the end of their JIRA URL, with the URL-encoded username and password values. For example if your username is jsmith@acme.com and the password is NoPwd!, your URL would be:
https://jira.acme.com/?os_username=jsmith%40acme.com&os_password=NoPwd!
This is not secure because the password is exposed, but is the only way to use JIRA username and password to log in after SP-initiated SSO is configured. If your company wants to have SP-initiated SSO and to disable JIRA's query parameter authentication, follow the steps below.
To disable back door login for SP-initiated SSO:
-
Stop the JIRA application. For example, in Windows 7, go to Control Panel > Administrative Tools > Services, then right-click Atlassian JIRA the service and select Stop.
-
In your favorite text editor, open <your-atlassian-directory>\JIRA\atlassian-jira\WEB-INF\web.xml.
-
Find the <filter-mapping> with the name samlFilter.
-
Move the whole <filter-mapping> with the name samlFilter before the <filter-mapping> with the name login. For example:
<!-- Centrify JIRA SAML -->
<filter-mapping>
<filter-name>samlFilter</filter-name>
<url-pattern/*</url-pattern>
</filter-mapping>
<filter-mapping>
<filter-name>login</filter-name>
<url-pattern/*</url-pattern>
<dispatcher>REQUEST</dispatcher>
<dispatcher>FORWARD</dispatcher>
</filter-mapping>
-
Save web.xml.
-
Start the JIRA application. For example, in Windows 7, go to Control Panel > Administrative Tools > Services, then right-click Atlassian JIRA the service and select Start.
Wait a few minutes for the service to start. The new settings that you just configured will be used after JIRA starts.
Please note that the os_username and os_password parameters can still be used while calling JIRA RESTful services. For example if your username is jsmith@acme.com and the password is NoPwd!, your URL would be:
https://jira.acme.com/rest/api/latest/issue/PC-11?os_username=jsmith%40acme.com&os_password=NoPwd!
(Optional) Disabling Just-In-Time User Provisioning
The setting to enable or disable just-in-time user provisioning is located in your JIRA catalina.properties file, by default located in <your-atlassian-directory>\conf*.*
To disable just-in-time user provisioning:
-
Open <your-atlassian-directory>\conf\catalina.properties in a text editor.
-
Find com.centrify.cloud.saas.jirasaml.jitUserProv.enabled.
-
Set its value to false.
-
Save catalina.properties.
-
Start the JIRA application. For example, in Windows 7, go to Control Panel > Administrative Tools > Services, then right-click Atlassian JIRA the service and select Start.
Wait a few minutes for the service to start. The new settings that you just configured will be used after JIRA starts.
To disable only the email notification of just-in-time user provisioning:
-
Open <your-atlassian-directory>\conf\catalina.properties in a text editor.
-
Find com.centrify.cloud.saas.jirasaml.jitUserProv.sendsEmail.
-
Set its value to false.
-
Save catalina.properties.
-
Start the JIRA application. For example, in Windows 7, go to Control Panel > Administrative Tools > Services, then right-click Atlassian JIRA the service and select Start.
Wait a few minutes for the service to start. The new settings that you just configured will be used after JIRA starts.
(Optional) Disabling SAML User Update
SAML user update will update a JIRA user’s email address and full name to the ones specified in SAML assertion. The setting to enable or disable this feature is located in your JIRA catalina.properties file, by default located in <your-atlassian-directory>\conf*.*
To disable user update:
-
Open <your-atlassian-directory>\conf\catalina.properties in a text editor.
-
Find com.centrify.cloud.saas.jirasaml.samlUserUpdate.enabled.
-
Set its value to false.
-
Save catalina.properties.
-
Start the JIRA application. For example, in Windows 7, go to Control Panel > Administrative Tools > Services, then right-click Atlassian JIRA the service and select Start.
Wait a few minutes for the service to start. The new settings that you just configured will be used after JIRA starts.
(Optional) Disabling SAML group update
SAML group update will update a JIRA user’s groups in JIRA to the ones specified in SAML assertion. The setting to enable or disable this feature is located in your JIRA catalina.properties file, by default located in <your-atlassian-directory>\conf*.*
To disable group update:
-
Open <your-atlassian-directory>\conf\catalina.properties in a text editor.
-
Find com.centrify.cloud.saas.jirasaml.samlGroupUpdate.enabled.
-
Set its value to false.
-
Save catalina.properties.
-
Start the JIRA application. For example, in Windows 7, go to Control Panel > Administrative Tools > Services, then right-click Atlassian JIRA the service and select Start.
Wait a few minutes for the service to start. The new settings that you just configured will be used after JIRA starts.
For More Information
-
See JIRA Server specifications for a list of features and functionality specific to JIRA.
-
For JIRA non-SSO information, see JIRA Documentation.
-
For configuration between Delinea SAML Plug-in and JIRA Server, contact Delinea Support.
JIRA Server specifications
Each SAML application is different. The following table lists features and functionality specific to JIRA Server.
| Capability | Supported? | Support details |
|---|---|---|
| Web browser client | Yes | |
| Mobile client | No | |
| SAML 2.0 | Yes | |
| SP-initiated SSO | Yes, optional | |
| IdP-initiated SSO | Yes | |
| Force user login via SSO only | Yes | |
| Separate administrator login after SSO is enabled | No | |
| User or Administrator lockout risk | Yes | Because SP-initiated SSO always redirects users to Delinea and disables the function of JIRA login pages, users run the risk of being locked out of JIRA. The configuration in leaves JIRA's query parameter authentication available, so that users can use their JIRA username and password to log in to JIRA if needed. For more information about using JIRA’s query parameter authentication to set up a back door URL for administrators and users, see . |
| Automatic user provisioning | Yes | |
| Multiple User Types | Yes | SSO works the same way for all admin and non-admin user types. |
| Self-service password | Yes | Users can reset their own passwords. Resetting another user’s password requires administrator rights. |
| Access restriction using a corporate IP range | Yes | You can specify an IP Range in the Admin Portal Policy page to restrict access to the application. |