Azure AD Open ID Connect
To configure Azure AD OIDC with ALM:
Create a New App Registration
-
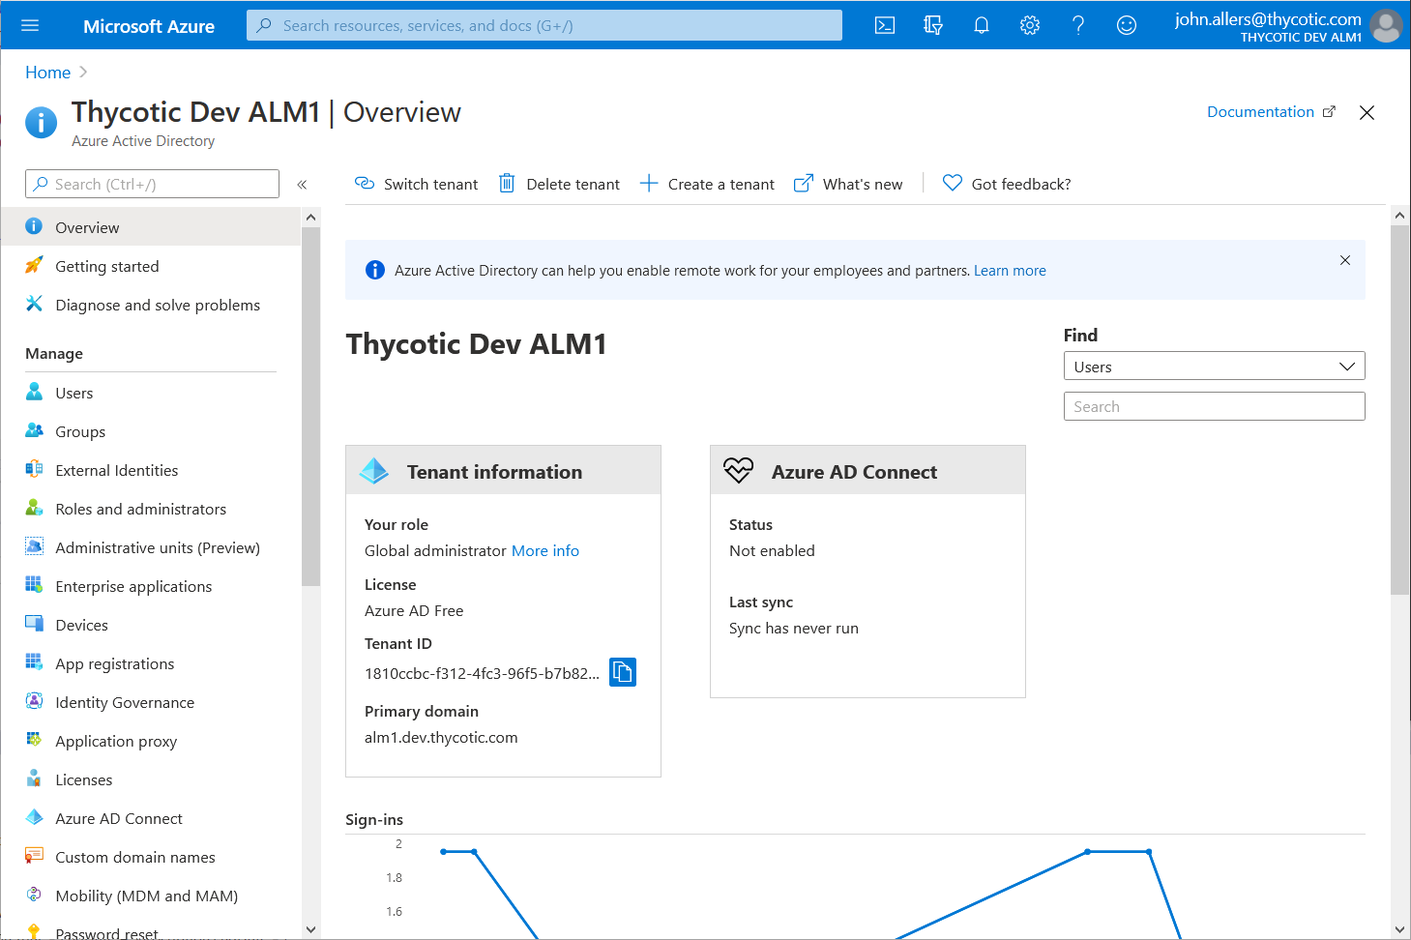
Navigate to portal.azure.com and then Azure Active Directory.
-
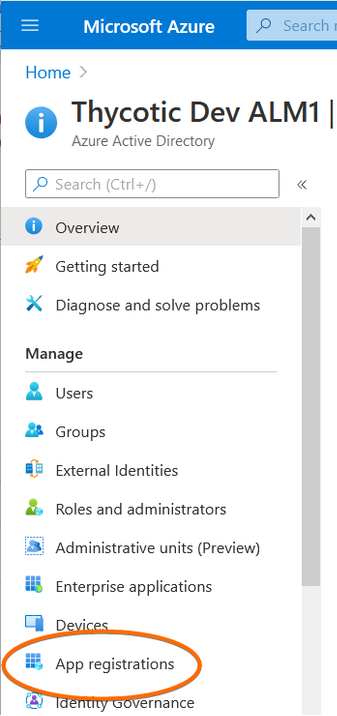
In the left-hand navigation panel, select App registrations.
-
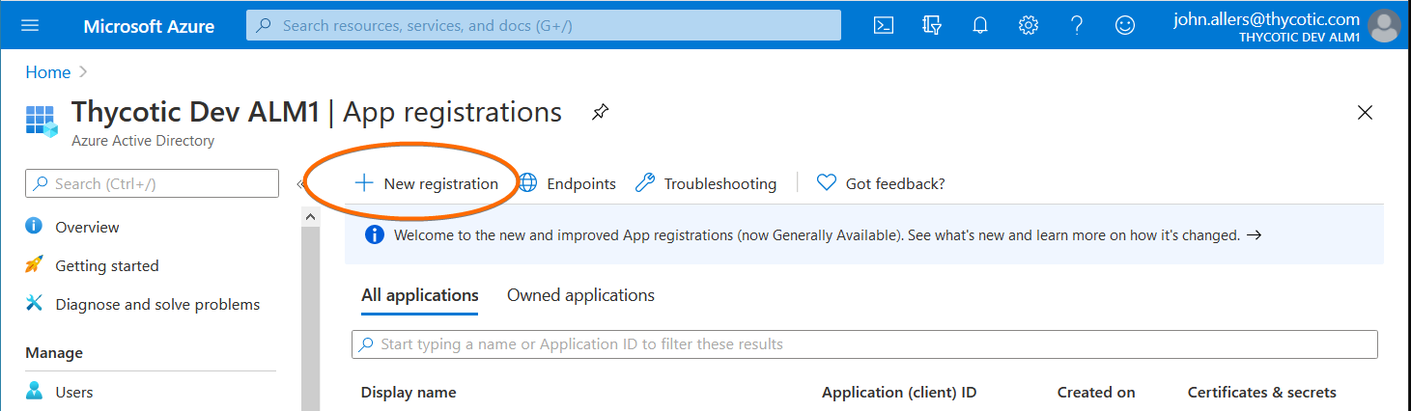
On the top of the App registration page, click +New registration.
-
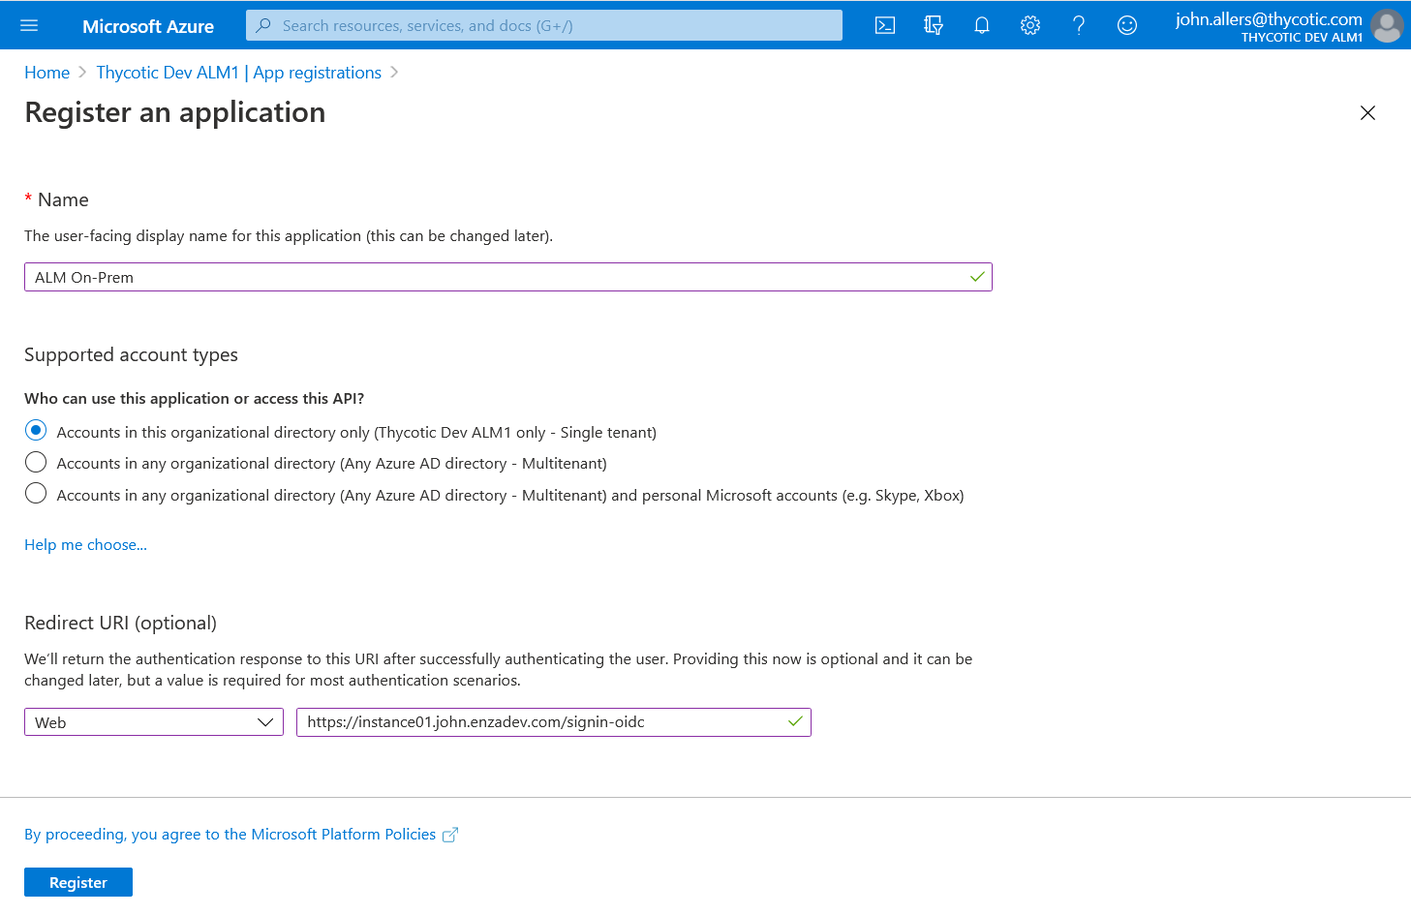
On the Register an application page, provide:
- Name- the name you would like for ALM. (Example: ALM On-Prem)
- Supported account types- choose single tenant (default).
- Redirect URI- set the drop-down to Web and provide the sign-in URL for your ALM instance.
-
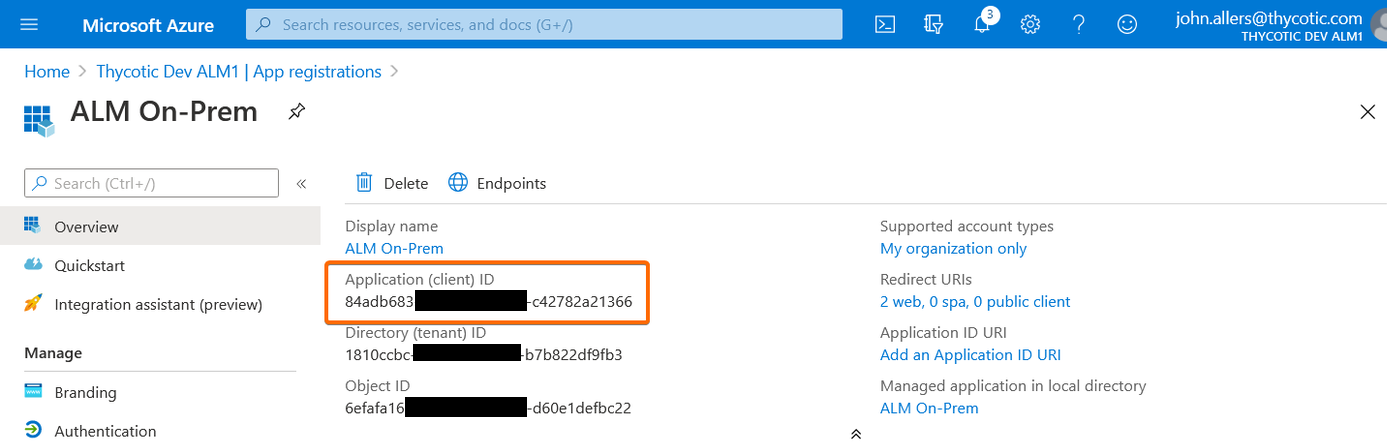
Click register. You will be taken to the newly created App registration page.
-
On the registration page, take note of the Application (client) ID value. This will be used for the OIDC Client ID value during ALM setup.
Configure OIDC URLs
-
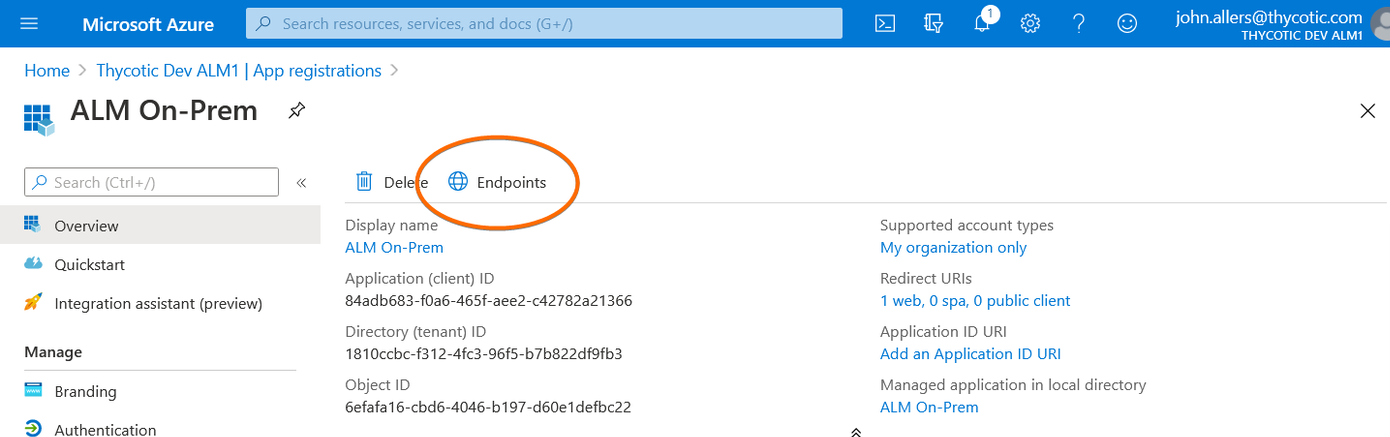
On the top of the registration page, click Endpoints. The endpoints dialogue will open.
-
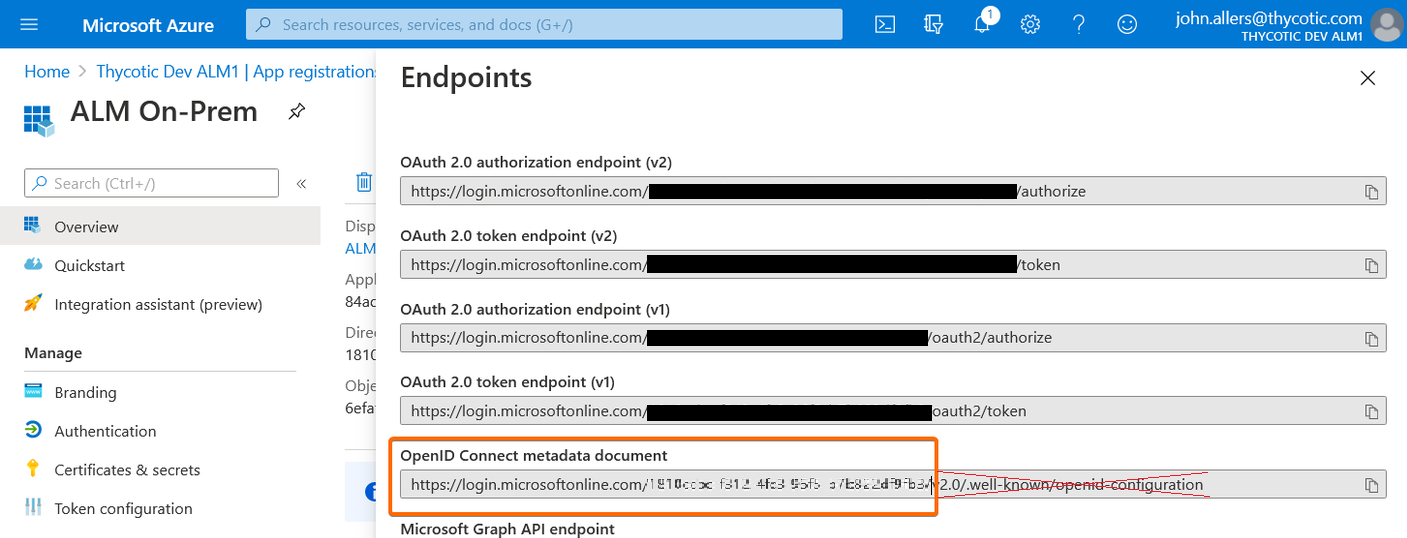
Copy the OpenID Connect metadata document value, but omit the v2.0/well-known/openid-configuration portion of the URL. This will be the OIDC Authority URL.
-
Close the Endpoints dialogue.
-
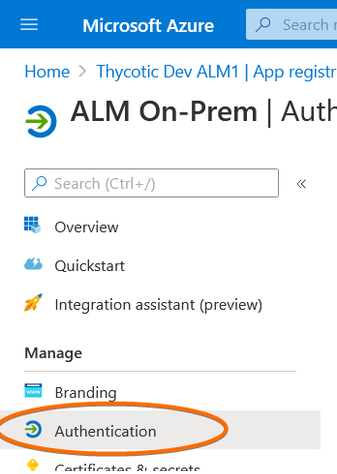
On the left-hand navigation menu, click Authentication. The Platform configurations panel will open.
-
Under Web, click Add URI.
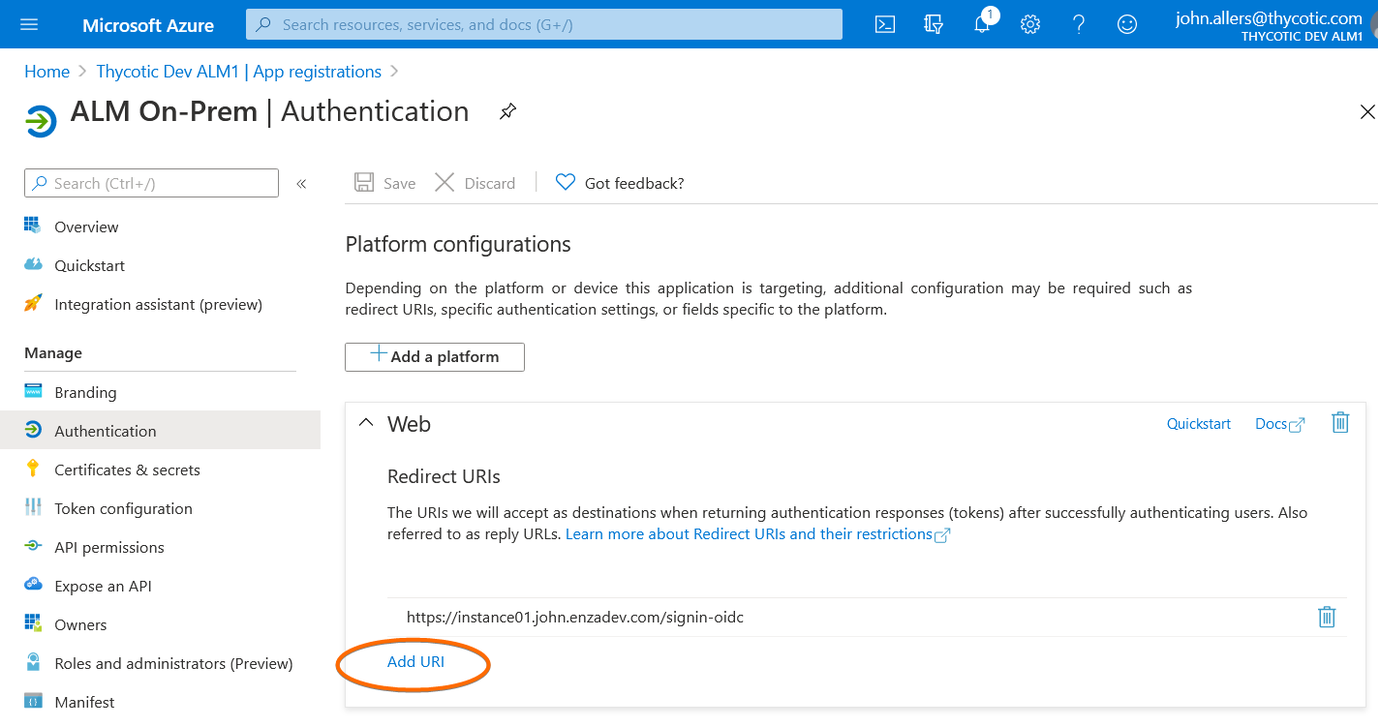
-
Enter https://YOUR_ALM_DOMAIN/signout-callback-oidc.
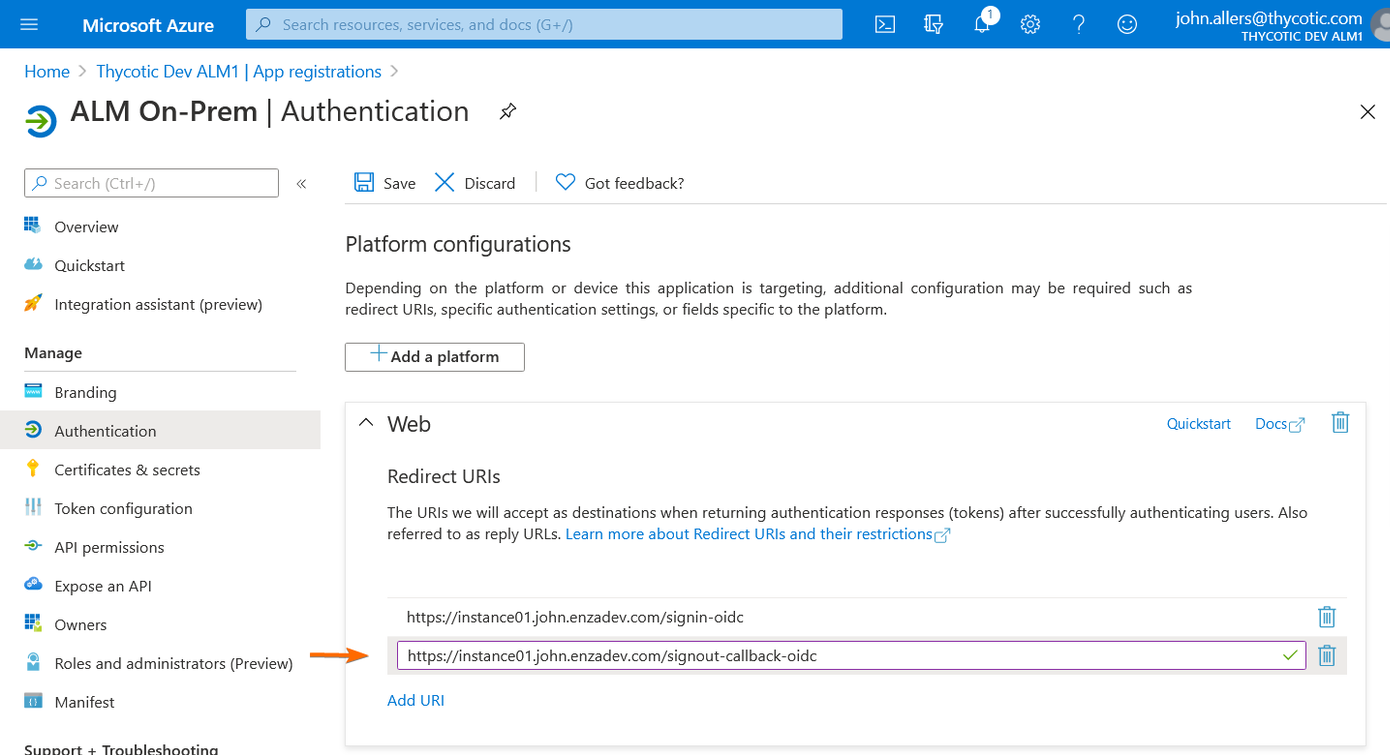
-
On the top of the panel, click Save.
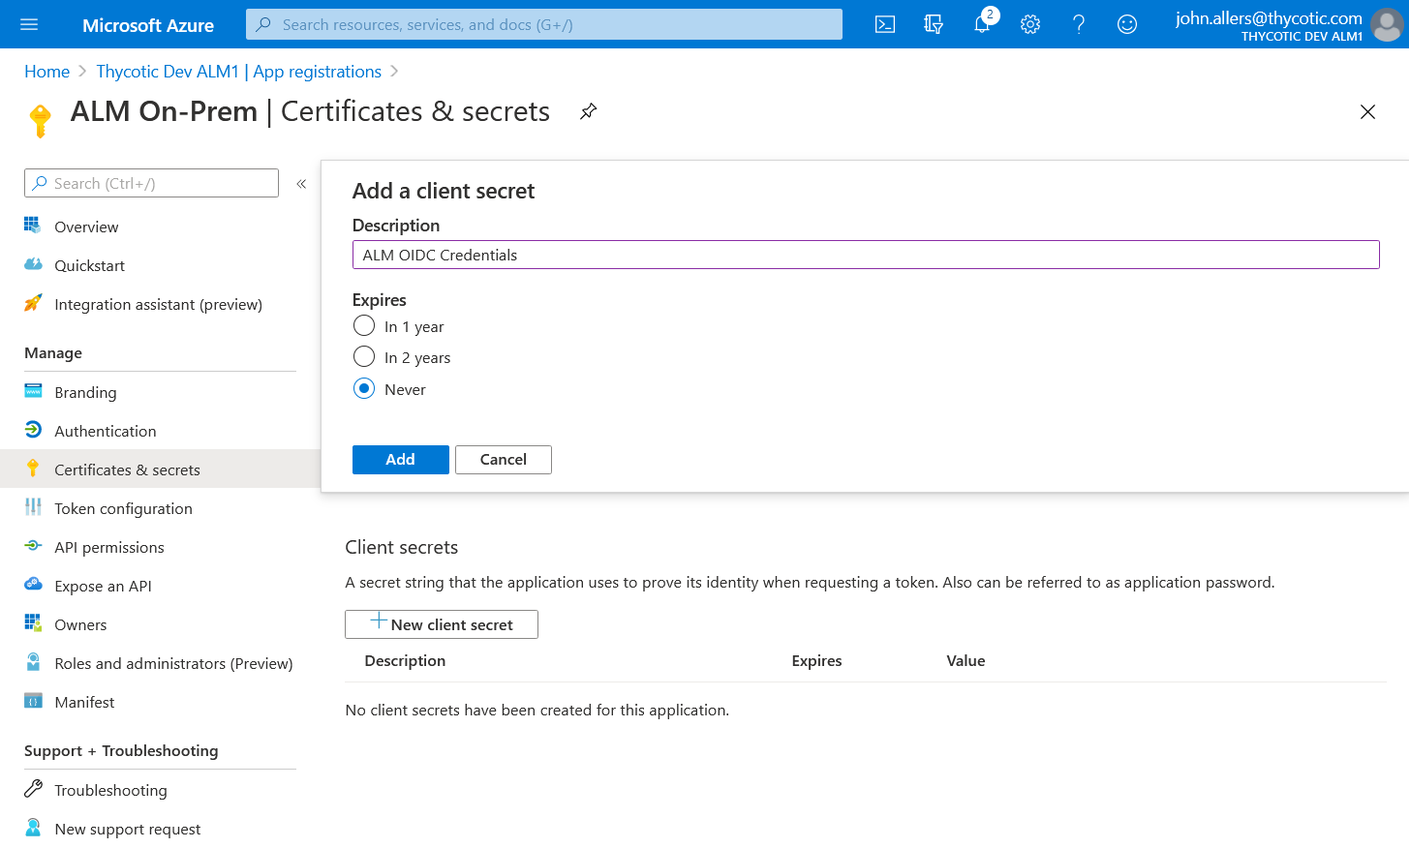
Create Client Secret
-
In the left-hand navigation menu, click Certificates & secrets. The Certificates & secrets panel will open.
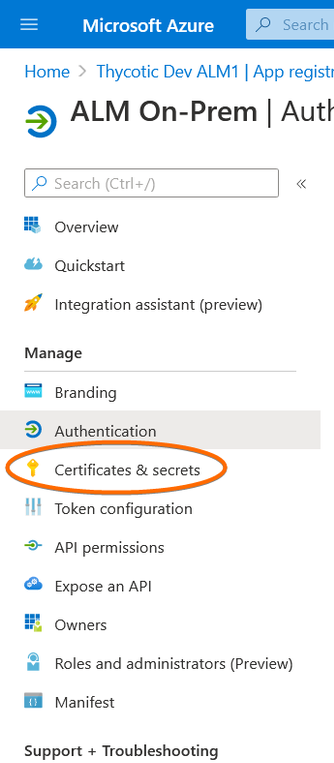
-
Under Client secrets, click New client secret.
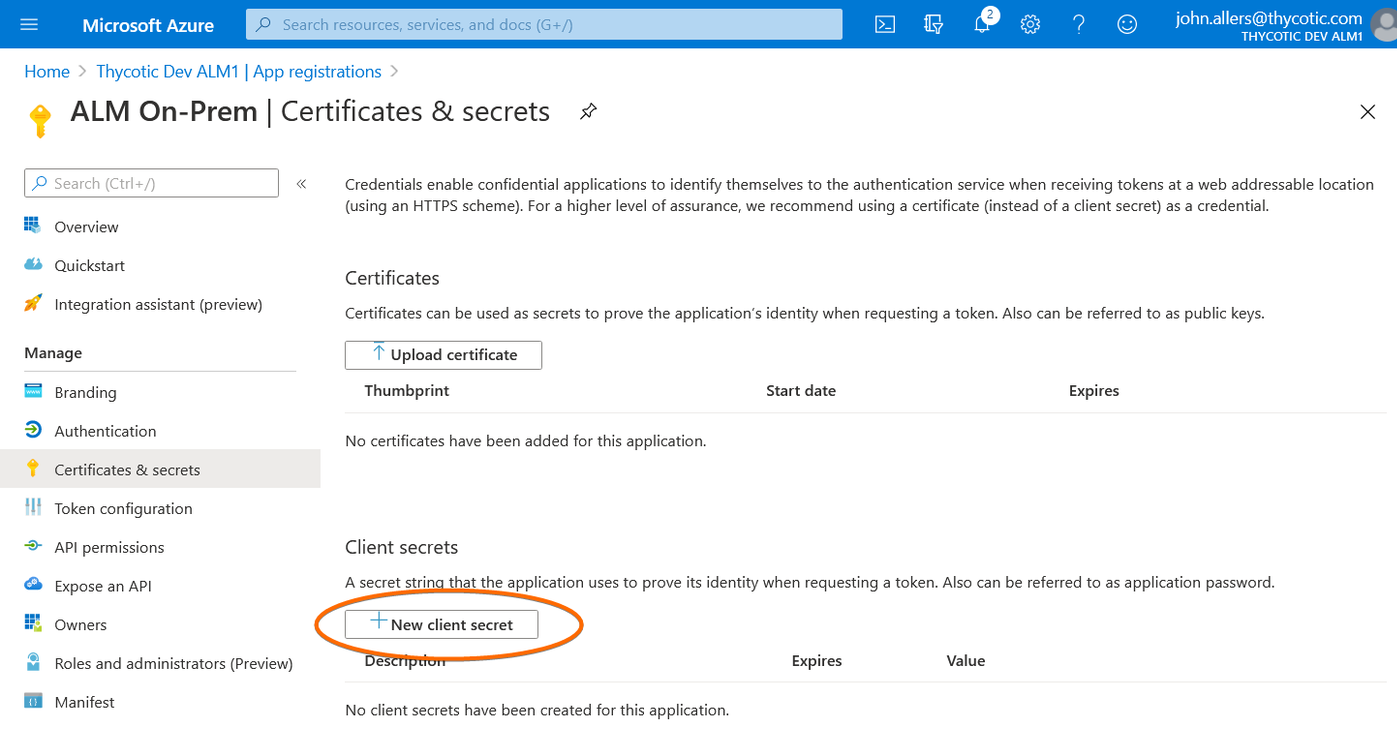
-
On the Add a client secret dialog, choose:
- A description. (Example: ALM OIDC Credentials)
- An expiration date. When this secret expires, ALM will need to be reconfigured with manually with a new secret.
-
Click Add to save the new client secret.
-
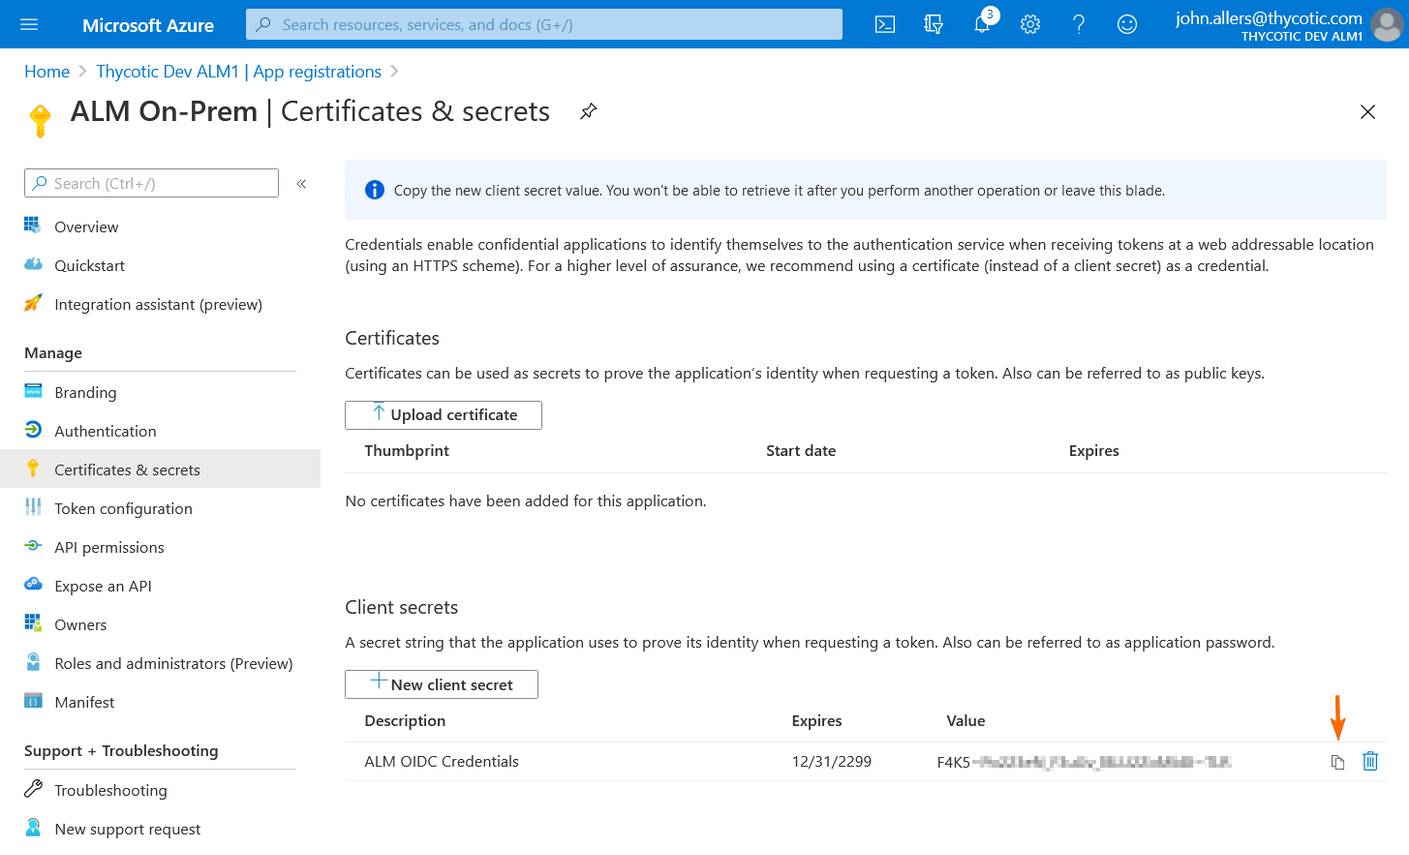
The new secret will now be displayed in the Client secrets section of the Certificates & secrets page.
-
Click the Copy to clipboard icon and store the secret value. It will be used as the OIDC Client Secret during ALM setup.
-
The OpenID connect configuration for Azure AD is now ready for use with ALM.