Account Migration
Using the Account Migration Wizard, administrators can move existing accounts to different workflow templates or between different versions of a template.
Migrating accounts from one workflow template to another may be desired when workflow templates have a version change. Administrators can also add additional attributes to be updated in Active Directory/Azure AD during this migration. Administrators can specify attribute values to update in Active Directory/Azure AD or leave the values blank so they inherit the values present in Active Directory/Azure AD.
Only accounts that are active and before their end-of-lifecycle can be migrated.
- At the Home page, select Migrate Accounts.

-
Select Type & Domain.

- From the Account Type drop-down menu, choose from Active Directory, Azure Active Directory, or Group Managed Service Account.
- From the Domain drop-down menu, select the Domain accounts will be migrated from. Accounts cannot be migrated between domains.
- Click Next in the upper right-hand corner.
-
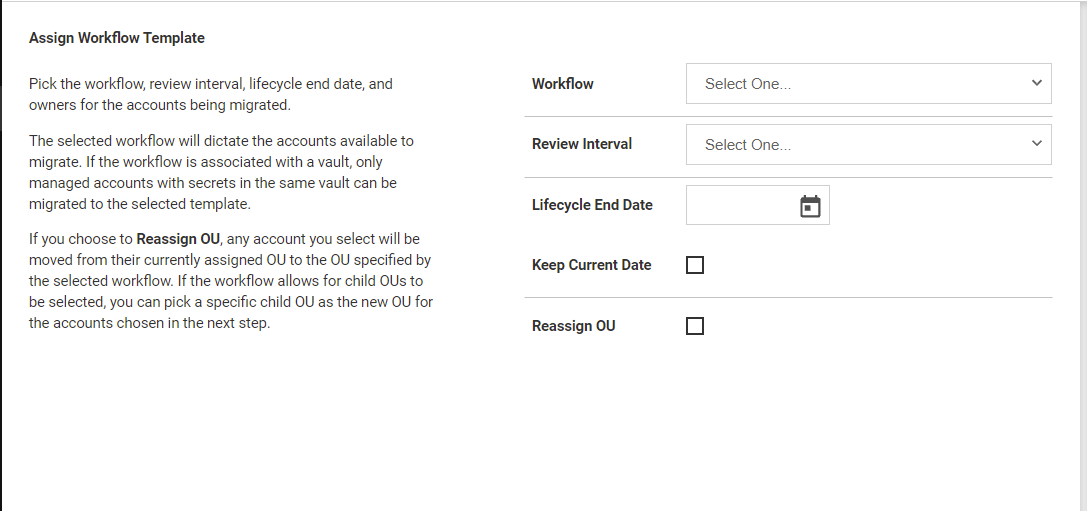
Assign Template.

-
At the Workflow drop-down, select the available accounts to be migrated from. If the workflow is associated with a vault, only managed accounts with secrets in the same vault can be migrated to the selected template.
-
The selection for Review Interval determines when an accounts end of lifecycle will occur. Choosing a date in the past will cause the accounts to expire as of midnight (00:00) UTC.
-
Enable Keep Current Date to leave each migrated account with it's current End of Life date.
-
Enabling Reassign OU moves any selected account from its currently assigned Organizational Unit (OU) to the OU specified by the selected workflow. If the workflow allows for child OUs to be selected, a specific child OU can be selected as the new OU for the accounts to be migrated.
-
Choose Reassign Secret Folder to limit the selection of accounts in the next step to only those accounts that have a secret associated with them. (This option is only available when Secret Server is used as the vault.)
-
Click Next in the upper right-hand corner.
-
-
Select Accounts.

-
Choose the accounts to be migrated by clicking the check box to the left of the account name, or enable the check box next to the Search bar to select all accounts.

-
Use the Search field to display all accounts that match the search criteria. Use the Filter drop-down to restrict the list of accounts to specific End of Lifecycle account types, Workflows, or accounts created on a specific date.
-
Click Next in the upper right-hand corner.
-
-
Set Attributes.

-
The list of available accounts are displayed in the Accounts panel on the left of the page. Select an account to populate its associated attributes. Select Update All to display attributes from all accounts.
For Update All operations, any attributes shared between accounts will be updated in bulk for all accounts. Additionally, attributes not present in an account will be added; attributes no longer defined in the migrated template will no longer appear.

-
If needed, edit the current value for an attribute. Blank values are supported. Blank values will be pulled in from Active Directory with bulk refresh.
Use blank fields to support unique values, otherwise the same value will be added in bulk to all accounts when performing an Update All operation.
-
If needed, click Add Attribute to add a new attribute to the account. Available attributes will be limited to those on the template being migrated to. Select from the available attributes and click Add. If Update All is selected, the attribute will be added for all accounts.
-
Click Remove to remove an attribute. That attribute will no longer be tracked in the managed account.
Note:Remove does not remove the attribute from the account in the domain.
-
Click Next in the upper right-hand corner.
-
-
Select Owners.

-
Next, assign owners for each account. You can set the owners for each individual account, or assign the same group of owners to all accounts. Click Remove next to a user or group in the list to remove the user or group from the account.
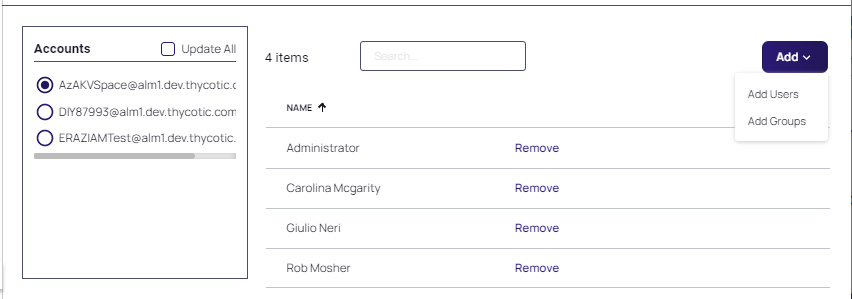
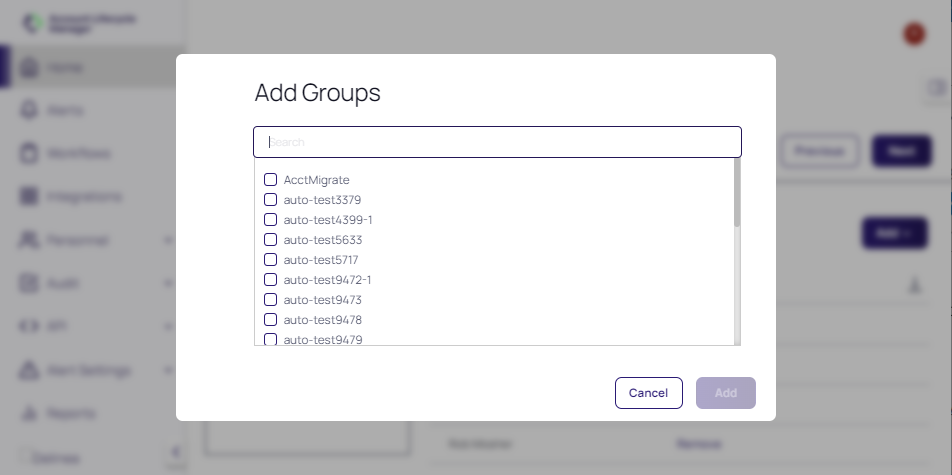
To add a user or group, click Add and select either Add Users or Add Groups. When prompted, select the users or groups to add as owners and click Add.
- Click Next in the upper right-hand corner.
-
-
Finalize.

-
Review the domain name, workflow template, review interval, lifecycle end date, accounts, and owners. Change information by clicking on the previous steps. Make sure to click Next on any updated fields.
-
Once you have verified that the information is correct, click Complete to finalize the wizard and move the accounts.
-